The only way to attain proficiency in programming is to practise, and practise YOU MUST! This includes trying out and experimenting with the programs presented in the lectures, as well as the tutorials, and programming exercises. It is not good enough just to read C code. You must type it in, compile it, and run it! Your programming aptitude can only be improved with programming experience. As you will be using a UNIX platform for C programming, we have provided a step-by-step walkthrough which will guide you through the following:
You need to be very familiar with programming on a UNIX platform as you will be required to program in UNIX during your weekly lab sessions.
The following instructions are meant for installing a Unix emulator on a Windows PC only. If you're using a Mac, you may skip to the end of this section.
In order to use a Unix environment in Windows, we shall use a portable version of MinGW which is a UNIX-like environment and command-line interface. You can install MinGW in two ways:
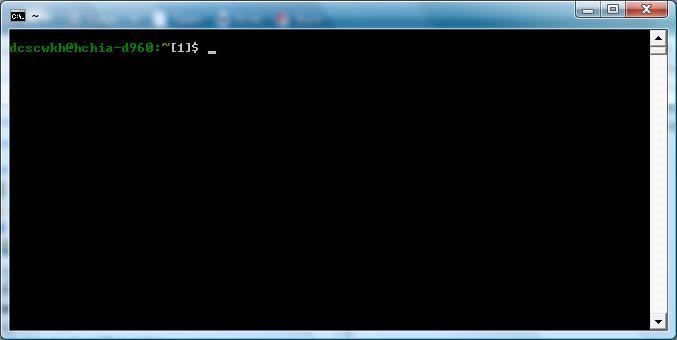
Download MinGW.zip and extract the contents to the root directory of a non-administrative drive (typically D:\, E:\, F:\, G:\, but not C:\). The following files will be extracted:
user@machine:~[xxx]$then you would have successfully performed the necessary setup on your local machine. Note that user and machine varies with different users and machines, and xxx is a running number. You are now at the home directory level of your very own UNIX platform. A directory is similar to a folder in Windows. In particular, the home directory is located in
your_root_install_dir/MinGW/msys/1.0/homeThe UNIX emulator can now be used. To exit, do not close the window by clicking on × at the top corner. Just enter the command exit. You may also open multiple windows, if necessary, by repeatedly clicking on start.bat.
Mac Installation
As for a Mac, start up the Terminal application from the Utilities folder.
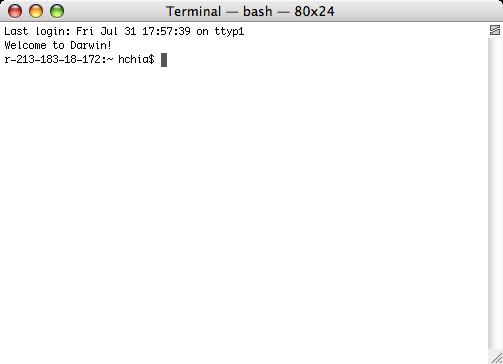
Next, check if the "gcc" C program compiler exists by entering the command "gcc --version". If you see a "command not found" message, then you need to download and install Xcode from http://developer.apple.com/xcode. Once installed, click on Xcode -- Preferences, under Components, and install Command Line Tools.
The process of creating a working C program involves the following steps:
        +---------+
+---+-->|  EDIT   |
|   ^   +---------+
|   |        |
|   |        |
|   |        v
|   |   +---------+
|   +---| COMPILE |
|       +---------+
|            |
|            |
|            v
|       +---------+
+-------|   RUN   |
+---------+ |
|
| |
|
In this course, we use vim -- a powerful editor with many commands, but with the knowledge of only a few simple commands, programs can be created quite easily. Enter the following at the UNIX prompt.
user@machine:~[xxx]$ vim distance.cThe editor will start in COMMAND mode. To edit, go to INSERT mode by pressing the "i" key. Notice that "-- INSERT --" appears at the bottom left corner of the screen. To go back to COMMAND mode, simply press "<ESC>".
Now in INSERT mode, type out the following program:
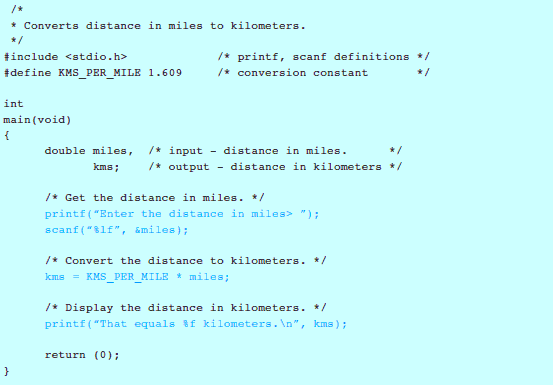
When you are done, press the five keys "<ESC>:wq<ENTER>" one after another. to save your program and exit from the vim editor. <ESC> means pressing the Escape key, then press the colon key (shift-;), then press w, then press q, and finally <ENTER> means pressing the Enter key. If you want to save your file without exiting from the vim editor, press "<ESC>:w<ENTER>". To continue editing your program, remember to press "i" key for INSERT mode.
The following shows you a list of useful commands in vim:
To undo or redo in vim, ensure that you are in COMMAND mode and press lowercase "u" or control-R respectively. If you would like to learn more about vim commands, click HERE.
When you begin writing bigger programs, you will find the need to move around or delete portions of code. To do this in vim, ensure that you are in COMMAND mode by pressing <ESC>. Using your arrow keys, go to the top (or bottom) of the section of code you want to move, press uppercase "V "to start highlighting. Using your up/down arrow keys, highlight the entire section of code.
Depending on what you want to do to the highlighted sections, you may press "d" for delete, "x" for cut or "y" for copy (or yank). Once a section has been cut or yanked, you may move to the appropriate point in your code and press uppercase "P" to paste.
You may also choose to use your mouse to highlight blocks of text and use the native Window's cut-and-paste functionality, but bear in mind that the end effect may be less desirable. In UNIX, we never use the mouse.
Having edited your program, save it and exit vim.
Compile your program by entering the following command:
user@machine:~[xxx]$ gcc -Wall distance.c
This will compile the program "distance.c". The "-Wall" flag tells the compiler to generate all warnings. Note that the W in "-Wall" must be an uppercase letter. Unix is case-sensitive. There will be error messages if your program has errors. In this case, go to step 2.1 to make the necessary corrections and re-compile. If there are no compilation errors, the compiler will produce the executable file "a.exe" (on a Mac or any UNIX-based machine it generates "a.out").
You are now ready to run your program by typing the name of the executable.
user@machine:~[xxx]$ ./a.exe
This will execute the file "a.exe".
Note that we prefix it with "./" to indicate that "a.exe" is in the current directory.
For a Mac or Unix-based machine, you should execute "a.out" accordingly.
Note that "a.exe" (or "a.out") is the default name of the executable file. You may specify the name of the executable file by using the "-o" option of the "gcc" command:
user@machine:~[xxx]$ gcc -Wall distance.c -o distance.exeIn the above, the executable file for "distance.c" is "distance.exe".
Do NOT ever type the following:
user@machine:~[xxx]$ gcc -Wall distance.c -o distance.cWhat is wrong with the above statement? It states that you want to name the executable file distance.c. This is wrong, because the executable file should NOT be the same as your source program file. In this case, you will LOSE YOUR SOURCE FILE!
Experiment a little by changing certain instructions of the program code and try to figure out what they do. Programming is fun in that you can try out all sorts of things and see the end results yourself! A lot can be learned through self-exploration alone!
The power of UNIX stems from the many commands it offers. The following are a few commonly used commands. This list is by no means exhaustive and you are urged to explore on your own. Note that UNIX commands are case-sensitive.
In the examples below, bold words are commands which you are expected to enter. All commands are to be entered after the UNIX prompt of the form
user@machine:~[xxx]$~ indicates that you are currently in your home directory.
| pwd | to Print current Working Directory to show you which directory you are currently in |
user@machine:~[xxx]$ pwd /home | |
| ls | to LiSt files in your current directory |
user@machine:~[xxx]$ ls distance.c | |
| mkdir | to MaKe a subDIRectory in current directory |
user@machine:~[xxx]$ mkdir c user@machine:~[xxx]$ ls -F c/ distance.c | "ls -F" distinguishes a normal file from a directory. The slash (/) beside the filename tells you that the file is a directory (folder). A normal file does not have a slash (/) beside its name. |
| cd | to Change Directory from current directory to another |
user@machine:~[xxx]$ cd c user@machine:~/c[xxx]$ ls | |
| Note that the prompt changes to ~/c to indicate that you are
now in the c directory below your HOME directory.
Entering "cd" alone brings you back to your HOME directory, ie. the directory in which you started with when you first logged into the system. | |
user@machine:~/c[xxx]$ cd user@machine:~[xxx]$ | |
| rmdir | to ReMove a subDIRectory in current directory -- note that a directory must be empty before it can be removed. |
user@machine:~[xxx]$ rmdir c user@machine:~[xxx]$ ls distance.c |
| cp | to CoPy files |
user@machine:~/doc[xxx]$ cp distance.c anotherfile user@machine:~[xxx]$ ls anotherfile distance.c | |
| mv | to MoVe files from one directory to another; can also be used to rename files. |
user@machine:~/doc[xxx]$ mv anotherfile afile user@machine:~[xxx]$ ls afile distance.c | |
| rm | to ReMove files. Be careful with this command -- files deleted cannot be restored (unless they have been backed up during the normal backup cycle). |
user@machine:~[xxx]$ rm afile rm: remove regular file `afile'? y user@machine:~/doc[xxx]$ ls distance.c |
| cat | to display (CATenate) the contents of files onto the screen |
user@machine:~[xxx]$ cat distance.c | |
| less | variant of "cat" (includes features to read each page leisurely) |
user@machine:~[xxx]$ less distance.c | |
| In "less", use <space> to move down one page, '' to move Back up one page, and 'q' to Quit from "less". |