Animation Lab [Sample Slides]
Animation Lab makes creating slick animations as easy as specifying the start and end positions. The animation in the following video was created using Animation Lab.
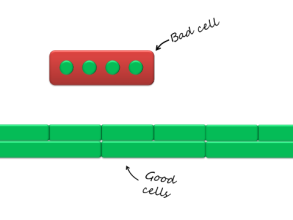
First, create a slide that will serve as the starting position of the animation: the start slide.
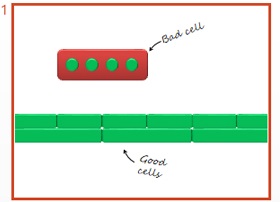
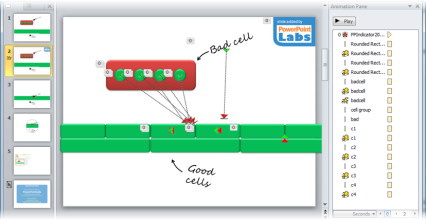
For the animation above, our start slide looks like this. Each of the items here is a separate shape, created using PowerPoint's shape tools.
Next, create the slide that will serve as the ending position of the animation - our end slide - by duplicating the start slide. This can be done either by right-clicking the slide in the slide list and selecting
Duplicate Slide, or by clicking on it and pressing ctrl-d on the keyboard.
Once the end slide has been created, modify the shapes on it so they resemble the state they should be in at the end of the animation.
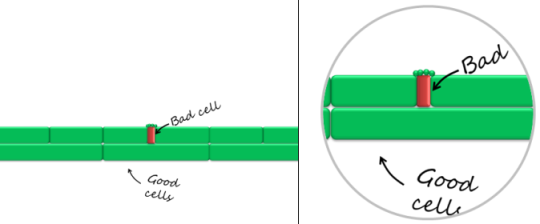
In our example, the end slide looks like this (with the changes magnified in detail on the right):
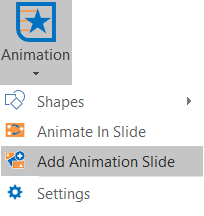
To create the actual animation, select the start slide, go to the PowerPointLabs
tab in the Office Ribbon, and click Add Animation Slide.
PowerPointLabs will create a new slide in between the start and end slides: the animation slide. These slides contain the actual animation effects, and can be identified by the PowerPointLabs logo in the top right corner.
Don't worry: the PowerPointLabs logo is invisible during the actual slide show.
That's all there is to it! You can play the slides to see how the animation turned out.
You can download the slides used in this example here.
Adjusting Animations
The easiest way to tweak the animations is to adjust the shapes in the start and/or end slides, then remove the animation slide, select the start slide and click Add Animation Slide in the PowerPointLabs tab in the Office Ribbon.
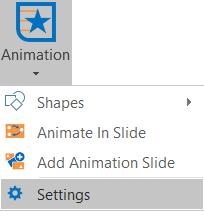
You can also adjust the length of the animation, or enable a smoother (but slightly more resource-intensive) animation method from the settings dialog:
If you'd like a more hands-on approach, you can manually tweak the animations using the PowerPoint animations pane.
Animation Tips and Tricks
Wrong Shapes being Animated?
This can happen when PowerPointLabs can't figure out which shapes in the end slide correspond to those in the start slide. You can fix this by ensuring matching shapes have the same name on both slides, using the selection pane.
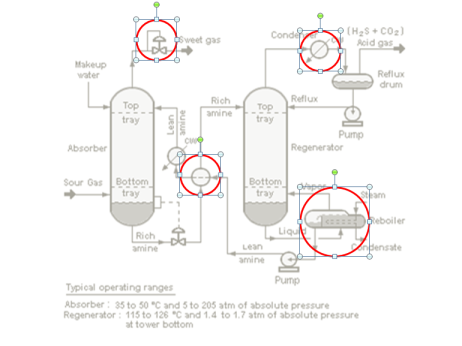
For example, notice how we have named the four green circles here c1, c2, c3, and c4 on both the start and end slides.
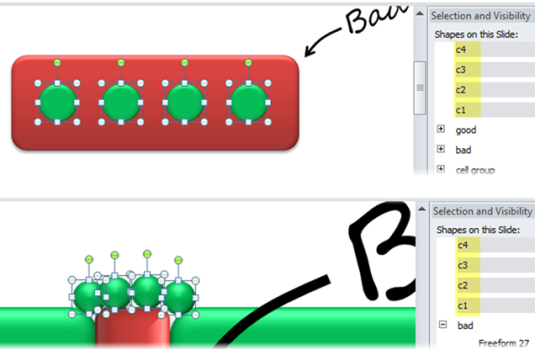
To rename a shape, either right-click on it and select Edit name in the submenu PowerPointLabs, or click on it in the selection pane.
Note: if multiple shapes on the same slide share a single name, the wrong shapes may be animated.
Moving Shapes Together
The easiest way to have many shapes moving together as one is to group them first. This can be done by selecting the shapes (either through the selection pane or by ctrl-clicking them), right-clicking, and selecting Group.
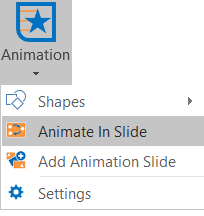
Animate In Slide
Animate In Slide can be used to create slick animations within a slide, just like those shown below:

To use Animate In Slide, place a copy of the shape to be animated at each "stop" along the desired animation path. Next, select the shapes in the order to be animated (by ctrl-clicking them), then click the Animate In Slide button.
To modify the animation, just move the shapes as necessary, select them, and click the Animate In Slide button again.