Release 3.1.3
Part Number A86039-01
Library |
Product |
Contents |
Index |
| Oracle Applications InterConnect Release 3.1.3 Part Number A86039-01 |
|
This chapter describes Applications InterConnect's design time concepts and iStudio, the GUI-based application for creating metadata that describes events, objects and other types of messages that interconnected applications use during runtime. It also explains how to perform important tasks including publishing and subscribing to an event using iStudio.
This chapter contains the following sections:
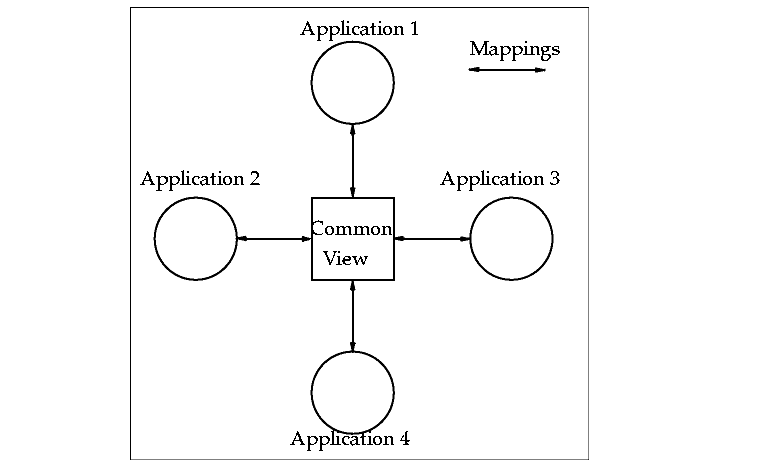
Applications InterConnect modeling is primarily based on the definition of a common format for data to be exchanged between interconnected applications. The model supports a hub-and-spoke architecture at the design level.
Each application possesses a specific format for each data structure used in the application. In iStudio, this "application view" of the data is mapped to a common view and stored as metadata in the Applications InterConnect Repository. At runtime, the metadata is retrieved from the repository by the adapter and used to map the application view of a specific data object to the common view and sent out as a message. Incoming messages likewise are converted from the common view to the application view and sent in to the application for processing.
This loose coupled paradigm ensures minimal modifications to integration when an application is modified or a new application is added.
Applications InterConnect supports three messaging paradigms. These paradigms are defined in iStudio at design time. The definitions are used at runtime to route the messages appropriately.
The messaging paradigms are:
Publish/Subscribe messaging is used when an application sends--or publishes--a message to each subscribing application, and does not wait for a reply. This is often referred to as a non-blocking call. Using iStudio, you define which application is the publisher and the subscriber for a particular message.
Request/reply messaging is used when an application sends a message and waits for a reply. In this paradigm, the application that sends the request blocks--or waits--for a reply. Even though many applications might be listening for this message, only one of them receives the message and sends a reply. The reply is sent using the point-to-point paradigm described below.
Point-to-Point messaging is used when the sending application specifies a destination and the message is delivered only to that destination.
Application integration using Oracle Applications InterConnect involves two phases. They are:
During the design phase, a developer uses iStudio to define the integration objects, applications which participate in the integration, and the specifications of the data exchanged between applications. All the specifications are stored as metadata in the Applications InterConnect Repository.
For each application participating in a specific integration, Applications InterConnect attaches an adapter to it. At runtime, the adapter retrieves the metadata from the Repository to determine the format of messages, and perform transformations between the various data formats, and route the messages to th3e appropriate queues under OMB.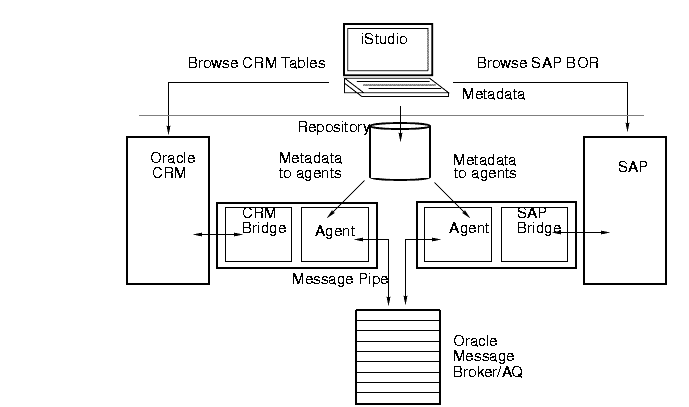
Applications InterConnect modeling is accomplished using iStudio, an easy-to-use graphical tool. These sections describe the concepts implemented by iStudio.
In iStudio, a project defines a Repository connection. To create a project, you have to specify the Repository connection information including the repository name and host. Several people may work on the same project.
Workspaces store user settings and preferences (for example, SAP and DB login credentials) in iStudio. In contrast, each iStudio project stores information about the current repository. When a project is opened in a workspace, it is automatically added to the list of recently opened projects. These are accessed by clicking File - Reload. To reload the repository, click on a project in the reload menu.
Each component that is integrated with Applications InterConnect is referred to as an application. Each application can specify the events and procedures it is interested in. The user can define the application views and transformations between these common objects and their application views.
For convenience and grouping, procedures and events are organized into business objects. A business object roughly corresponds to an object-oriented class. Procedures in the business object resemble methods in the class. For example:
Customer with a getAddress() procedure and a newCustomer event.
Events are used to model the publish/subscribe paradigm. Procedures are used to model the request/reply paradigm.
Applications InterConnect de-couples applications by introducing the concept of common objects. Procedures, events, and common data types (described below) are examples of common objects. The developer only needs to define interactions of an application with the common objects, and not with other applications directly. In other words, a point-to-point architecture is replaced by a hub and spoke architecture, with common objects serving as the representation of data in the hub.
Procedures are common objects that encapsulate functionality. Each procedure has a name and IN/OUT arguments. iStudio allows a developer to define procedures that different applications can invoke, or implement. For example:
getAddress(IN string Name, OUT string Address) where,

getAddress - name of the procedure

Name - IN argument of type string denoting person's name

Address - OUT argument of type string denoting person's address
If the case of two applications being integrated (for example, SAP and CRM), the CRM application can invoke the procedure getAddress. It does not need to know or specify which application implements the procedure. The procedure may be implemented by any ERP application such as the SAP application. Applications InterConnect does the necessary mappings at run-time and invokes the appropriate ERP function using the vendor-specific bridge.
There are two styles of the request/reply paradigm:
1. Asynchronous. The procedure invoking application does not block waiting for a reply. It makes an invocation and then continues normal processing. The OUT arguments are returned to the caller using a mechanism similar to callbacks.
2. Synchronous. The procedure invoking application blocks until it gets a reply. The OUT arguments are returned to the caller as part of the invocation. The caller then unblocks and continues with normal processing.
Applications may be interested in events that originate from another application. For example, when a CRM application when adds a new customer, the ERP application must be notified of the new customer. iStudio allows developers to define events that encapsulate this kind of information. Applications may publish or subscribe to events.
Events are defined by a name and the data attributes it contains. For example:
EVENT newCustomer CONTAINS

{

	String Name,

	String StreetName,

	String City

}

where,

newCustomer - Name of the Event, and

Name, StreetName, City - Event data attributes
NOTE: Events and procedures are defined as common objects. So, the data they contain is normally a superset of the data that being integrated across applications. (See Common Data Type for more information).
Each application that uses Applications InterConnect for integration defines its own definition or view of the common objects which is called the application view. This may be different or the same as that of the common object it mirrors.
For example, an application view that corresponds to the getAddress() procedure may be represented in this way:
getAddress(IN string LastName, IN string FirstName, OUT 	string Street, OUT
string City) where,

getAddress - name
LastName - IN argument of type string denoting person's last name
FirstName - IN argument of type string denoting person's first name
Street - OUT argument of type string denoting person's street address
City - OUT argument of type string denoting the city
Application views are mapped to or from common views depending on whether the application is invoking or implementing a function module.
Each application's view of data may be different than the common view. In these situations the developer should specify how fields in the application view map to fields in the common view. This mapping may also involve simple transformations on the fields being mapped.
For example, the LastName and FirstName fields of the application view may need to concatenated to the Name field in the common view. Applications InterConnect provides a set of standard transformations. However, the developer may define custom transformations in Java which can be imported into iStudio and plugged into the runtime system.
Data types enable users to model complex hierarchical data that is exchanged between applications. For example, a purchase order contains a header object and one or more line item objects. Both the header and line item can be defined as data types that are then used to define a PurchaseOrder data type.
Data types are also useful when you want to reuse data. For example, you can create a common data type (described below) called customer if you have multiple events that utilize customer information. This is a superior alternative to importing or typing the data that is transmitted with these events repeatedly.
Application data types are data types which each application defines to describe its application view of data.
Data types defined in the common view are referred to as common data types.
iStudio supports versioning for Common Data Types, Application Data Type, Events and Procedures.
Comprehensive versioning support is achieved by using the concept of an owner of these objects in addition to versions. An owner is the creator of the object. Only the creator of an object can modify the object. However, other users can create new versions or copy the original object under a new name. The owner is specified at the time of repository installation.
In the following example, the metadata is being created at Oracle, and at the time of repository installation, "Oracle" was specified as the owner of the metadata. The following functionality is available for versioning:
First, an event called "NewCustomerEvent" is created. When you create this object for the first time, the assigned owner is Oracle and the version is V1. This even is NewCustomerEvent/Oracle/V1.
If you are not the owner, you can change the contents of the event (the data associated with it) by clicking Modify, but you cannot change the version number or the name of the event. The event is NewCustomerEvent/Oracle/V1.
If instead, you want to keep the original NewCustomerEvent but want to create a new version of the information with modified data, click Create New Version. When you save this version, you now have two objects -- NewCustomerEvent/Oracle/V1 and NewCustomerEvent/Oracle/V2.
Not all versions of objects are loaded into iStudio. To work with a specific version of an object, use the Load Version capability. In the scenario above, when you created a new version it became your current version. Now to load NewCustomerEvent/Oracle/V1, you should use Load Version.
To create a NewBigCustomerEvent which has a lot of common elements with NewCustomerEvent/Oracle/V1, first load NewCustomerEvent/Oracle/V1 and then click Copy Object. Using Copy Object allows you to not only modify the data, but also modify the name of the event. When you have modified the name of the even, NewBigCustomerEvent/Oracle/V1 and NewCustomerEvent/Oracle/V1 will both coexist in the repository.
NOTE: You cannot type in a name that already exists.
In our scenario above, all the metadata was built at Oracle. Now we can transmit this metadata to a customer, NewCorp. When NewCorp installs the repository and specifies the owner as NewCorp, the metadata is in a read-only state. Now, if they want to customize NewBigCustomerEvent/Oracle/V1, they cannot modify the existing version since the owners are different. They can however, use the other features described above.
To customize the metadata, they must create a new version, so that NewBigCustomerEvent/Oracle/V1 and NewBigCustomerEvent/NewCorp/V2 coexist in the repository. The client can use both events in defining messages if required, and NewCorp can now modify the event it owns.
Cross Reference Tables and Domain Value Mappings are features supported by the Applications InterConnect platform to facilitate easy creation of mapping tables at design time, and their population, lookup, and deletion during runtime.
For example, consider two heterogeneous applications A and B being integrated through Applications InterConnect. To achieve integration, there is a requirement to maintain mapping tables that track the associations between the various identifiers (ids) created by the different systems. A customer created on application A has an id 100, while the same customer created on application B, as part of the integration, has an id 10000. The association between 100 and 10000 needs to maintained for subsequent information interchanges between the two applications. For example, if the address of the customer with id 100 is being updated by application A, and the change is propagated to application B, the id 100 needs to be automatically transformed to 10000 to ensure the correct record is updated at B. The Cross Reference Tables address this functionality.
In case of Domain Value Mappings the population of data occurs at design time. This feature is useful when the associations between the various ids (or names) is known at design time.
For example, the order status might be represented by BOOKED on application A, while its equivalent on B might be ORDERED. The association between BOOKED and ORDERED is maintained in a domain value map for order status.
Note: For information on content-based routing and load balancing, see Chapter 3, "Runtime Concepts and Components".
Message Type specifies the mode of communication between an adapter and an application.
iStudio is the GUI-based development tool that implements the concepts described in the previous section.
This section describes how to perform the various tasks required by Applications InterConnect during the design phase using iStudio. You can perform the tasks by referring to the steps described in the following sections.
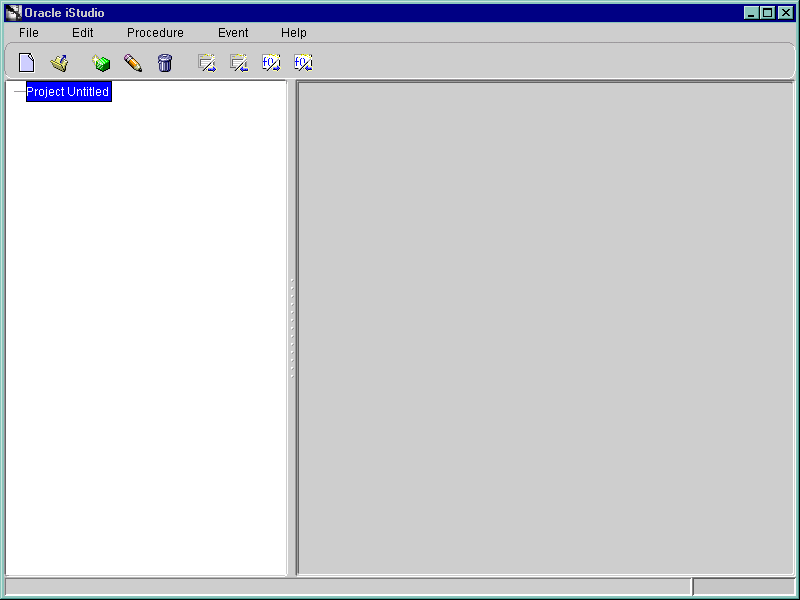
Toolbar

To define a new project, click File, and select New Project in the iStudio main menu panel. iStudio displays the New Project Dialog box: (Figure 2-5)
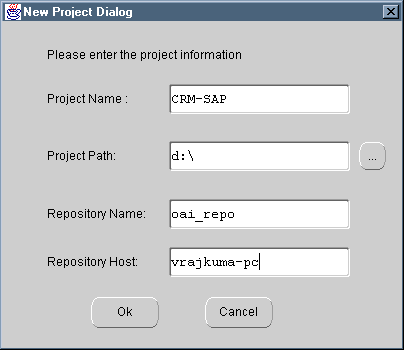
Enter the project details as follows:
Click OK to save the record, or Cancel to abort and exit.
To create a new workspace, click File and select New Workspace. The New Workspace Dialog is displayed:
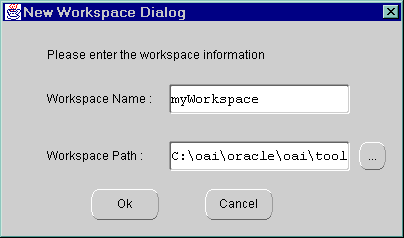
Enter the workspace details as follows:
Click OK to save the record, or Cancel to exit without saving the workspace.
When you start iStudio, the default workspace myWorkspace.iws and the last opened project is automatically loaded. To save the SAP and DB login credits, check the box Save settings as default in the SAP and DB login dialogs. The user settings are automatically saved to the workspace.
To open a workspace that has already been created, click File and select Open Workspace. The file system dialog is displayed. Enter the workspace name and path to open the workspace.
To define a new business object, click File / New, and select Business Object. The Create Business Object window is displayed: (Figure 2-7)
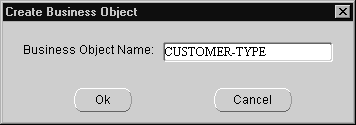
Enter the business object name:
Click OK to save the new business object or Cancel to exit.
To define a Common Data Type, click File/New and select Common Data Type. The Create Data Type window is displayed: (Figure 2-8)
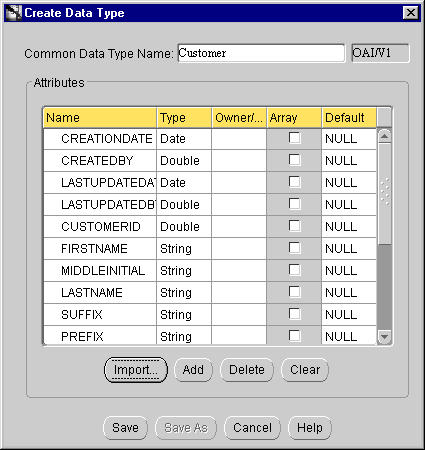
Enter common data type details as follows:
NOTE: The first version is always V1. For subsequent versions, choose Save As to save it as different version number--V2, V3, V4. etc.
You can import attribute definitions from various sources. For example, you can import them from a pre-existing database table or an API Repository.
Refer to the section on Importing Attribute Information to Import, Add, Delete, Clear the attributes.
Click Save to save and exit, Save As to save the Common Data Type as a different version, Cancel to exit without saving, or Help to display the help window.
Importing Attribute Information
Attributes can be imported from a database, SAP-BAPI, or SAP-IDOC. To import attributes from a database, perform these steps:
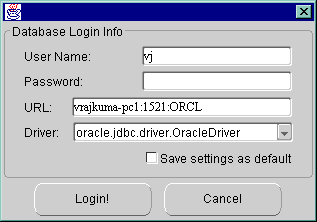
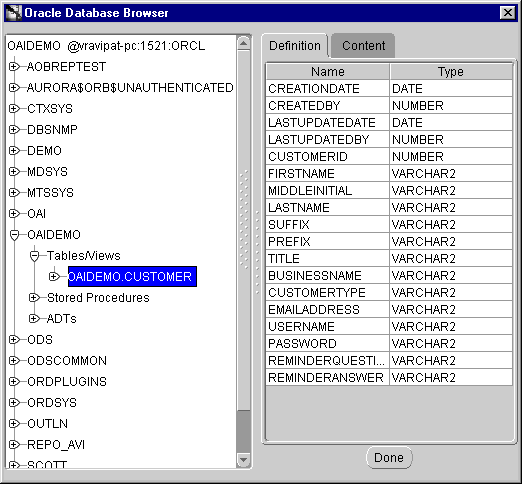

Click Add to add a new row of attributes, Delete to delete the selected attribute, or Clear to delete all attributes.
To create a Cross Reference Table, click File /New in the pull-down menu, and select Cross Reference Tables. The Create X_Ref Table Dialog is displayed. (Figure 2-12)
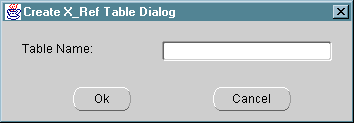
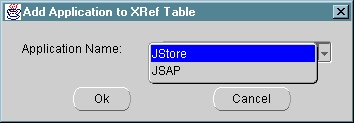
To add applications to the Cross Reference Table, select a Cross Reference Table in the project tree, right-click the Cross Reference Table, and click Add App. The Add Application to XRef Table window is displayed: (Figure 2-13).
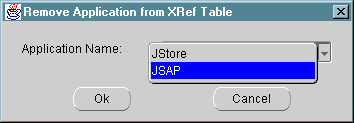
To remove applications from the Cross Reference Table, select a Cross Reference Table in the project tree, right-click the Cross Reference Table, and click Remove App. The Remove Application from XRef Table window is displayed: (Figure 2-14)
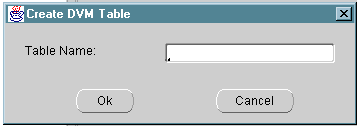
To create a Domain Value Mappings table, click File in the iStudio main menu panel, click New in the pull-down menu, and select Domain Value Mapping. The Create DVM Table Dialog is displayed. (Figure 2-15)
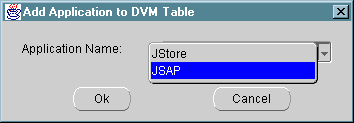
To add applications to Domain Value Mappings, select a Domain Value Mapping in the project tree, right-click the Domain Value Mapping, click Add App. The Add Application to DVM Table dialog is displayed. (Figure 2-16)
To remove applications from the Domain Value Mappings, select a Domain Value Mapping in the project tree, right-click Domain Value Mapping, and click Remove App. The Remove Application from Domain Value Mapping dialog is displayed.
In the Domain Value Mapping dialog, perform these two steps:
To add data to Domain Value Mappings, select a Domain Value Mapping in the project tree, right-click Domain Value Mapping, and click Edit Mappings. The Edit DVM Dialog is displayed: (Figure 2-17)
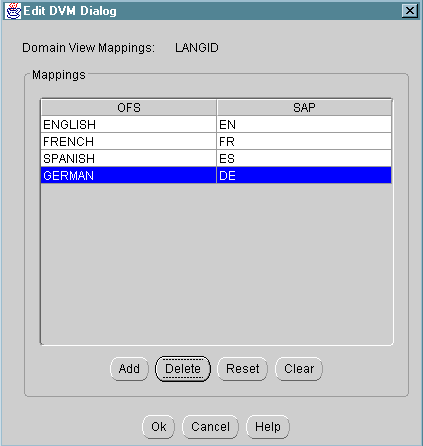
Enter the mapping values and click Add.
To delete or clear the values in the mappings table, select a Domain Value Mapping, and click Delete.
To delete the DVM table, right-click the Domain Value Mapping, and click Delete. The DVM table is deleted.
To create an event, click Project (your project name) in the iStudio main menu panel, click New in the pull-down menu, and select Event. The Create Event window is displayed: (Figure 2-18)
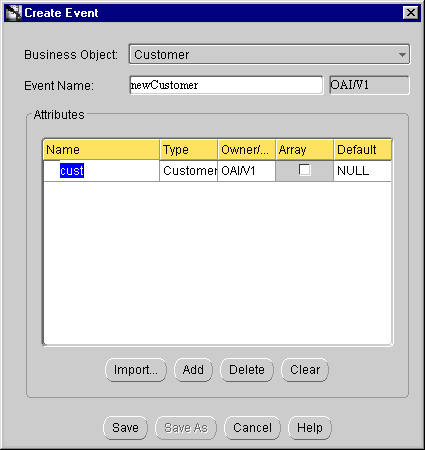
Enter event details as follows:
To create an application, click File in the iStudio main menu panel, click New in the pull-down menu, and select Application. The Create Application window is displayed: (Figure 2-19)
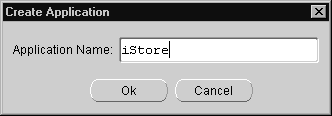
Enter event details as follows:
To create a procedure, click File in the iStudio main menu panel, click New in the pull-down menu, and select Procedure. The Create Procedure window is displayed: (Figure 2-20)
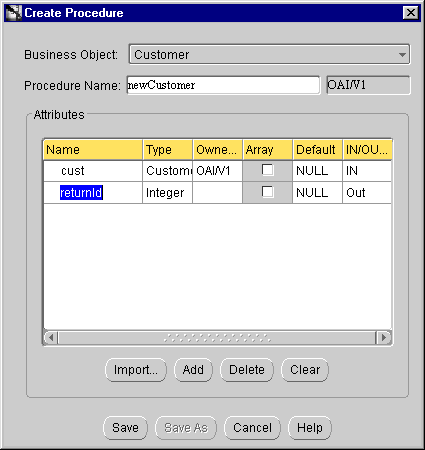
Enter the procedure details as follows:
To create a publish event in an application, click Event in the iStudio main menu panel, then click Publish in the pull-down menu. The Publish Wizard window is displayed: (Figure 2-21)
The Event Publish Wizard navigates you through these four steps:
The steps are described in detail in the following sections.
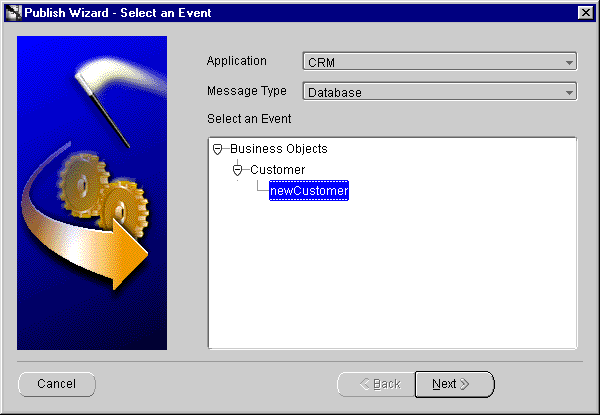
Enter the event details as follows:
You can select from the following Message Types:
Database--the adapter picks the message data from the database.
SAP-BAPI--the adapter communicates with the application using BAPI.
IBP--the adapter communicates with the application using IBP.
SAP-IDOC--the adapter communicates with SAP using IDOC.
XML--the adapter communicates with the application using XML.
After selecting the event to publish, you define the application view. The application view window is initially an empty table. You may define the attributes using the add button, or importing the definitions from a database or an API Repository.
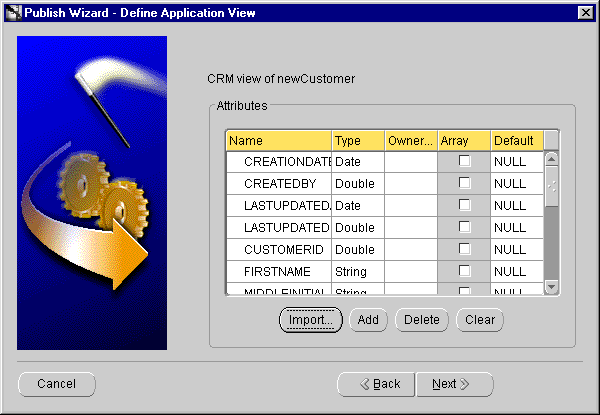
Enter these attribute details:
Refer to the section on Importing Attribute Information to Import, Add, Delete, Clear attributes.
Mapping can either involve copying the individual fields, or simple shape-change transformations.
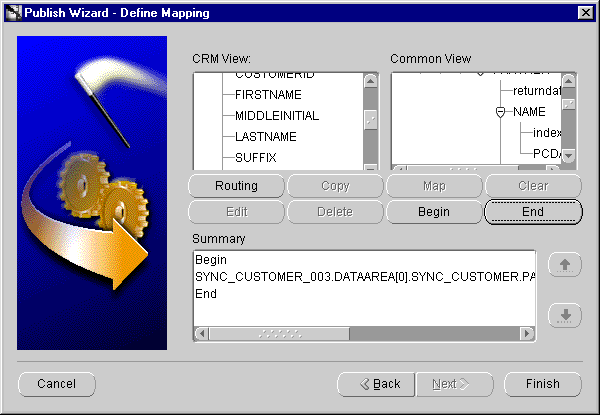
The publish event is now created.
Mapping Attributes
You may use the map button to specify transformations. For example, to map fields FirstName and LastName in the application view to Name in the common view, use the concat transform.
The following steps illustrate this example:
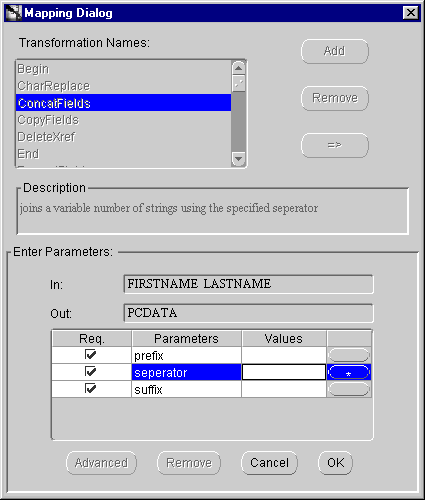
Copying Attributes
Delete Attribute Mappings
Edit Attribute Mapping
To create a subscribe event in an application, click Event in the iStudio main menu panel, then click Subscribe in the pull-down menu. The Subscribe Wizard is displayed: (Figure 2-25)
The Event Subscribe Wizard navigates you through four steps:
The steps are described in detail in the following sections.
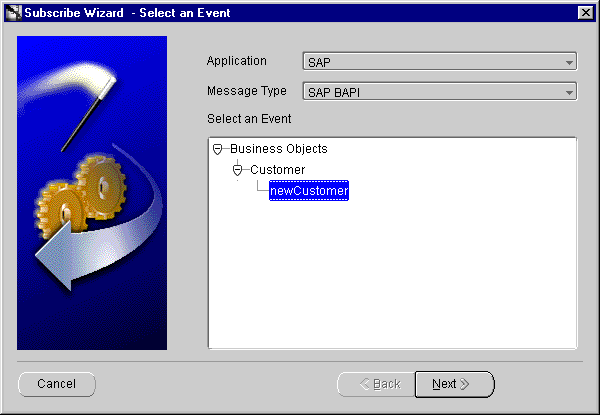
Enter the event details as follows:
You can select from the following Message Types:
Database--the adapter picks the message data from the database.
SAP-BAPI--the adapter communicates with the application using BAPI.
IBP--the adapter communicates with the application using IBP.
SAP-IDOC--the adapter communicates with SAP using IDOC.
XML--the adapter communicates with the application using XML. (See Publish Message, figure 2-28).
After selecting the event to publish, you define the application view. The application view window is initially an empty table. You may define the attributes by using the add button, or importing the definitions from a database or an API Repository.
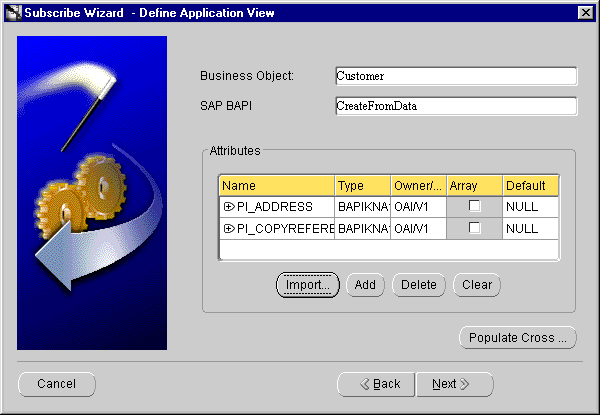
Enter the application view details:
Refer to the section Importing Attribute Information to Import, Add, Delete, Clear the attributes.
Click Populate XRefT, and a dialog is displayed: Enter the name of the Cross Reference Table. To populate and look up Cross Reference Table, refer to the section Populating Cross Reference Tables .
Click Next in the Subscribe Wizard to display the Mapping and Transformation window: (Figure 2-27)
Mapping can either involve copying the individual fields or simple shape change transformations.
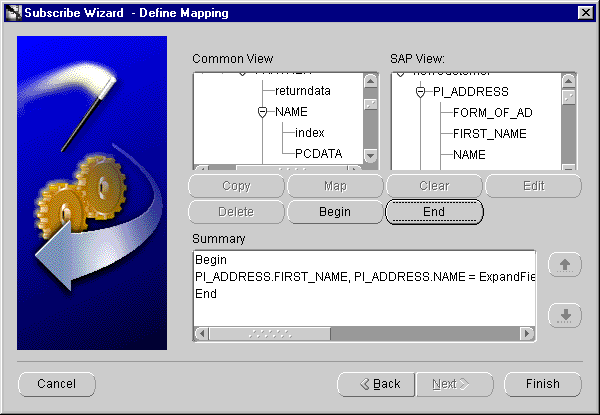
Click Finish. The subscribe event has now been created.
Populating Cross Reference Tables
To populate the Cross Reference Tables, you define a Returned Application Object which is the value returned by subscribe/implement code for populating the Cross Reference Table. The Returned Application Object is defined in the wizard.
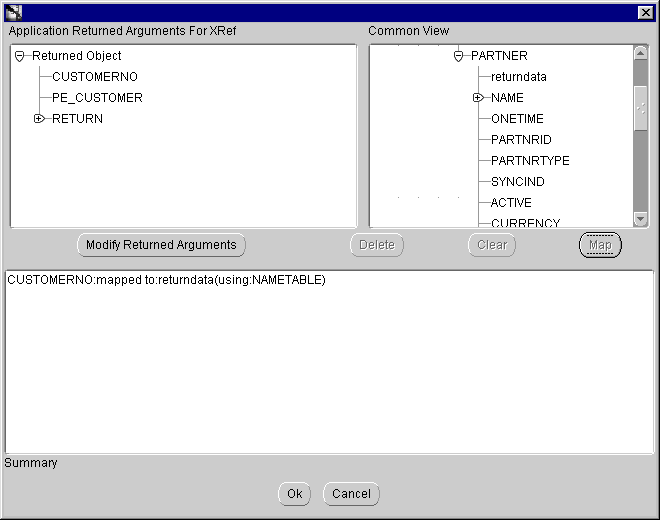
To view the lookup mapping in the Mapping option, refer to Lookup or Delete Cross Reference Mappings .
Mapping Attributes (Common to Application)
You may use the map button to specify transformations. For example, to map fields FirstName and LastName in the common view to Name in the application view you can use the concat transform.
The following steps illustrate this example:

Copying Attributes
Delete Attribute Mappings
Lookup or Delete Cross Reference Mappings
To create an invoking procedure in an application, click Procedure in the iStudio main menu panel, then click Invoke in the pull-down menu. The Invoke Wizard is displayed: (Figure 2-30)
The Invoke Procedure Wizard navigates you through these steps:
The steps are described in detail in the following sections.
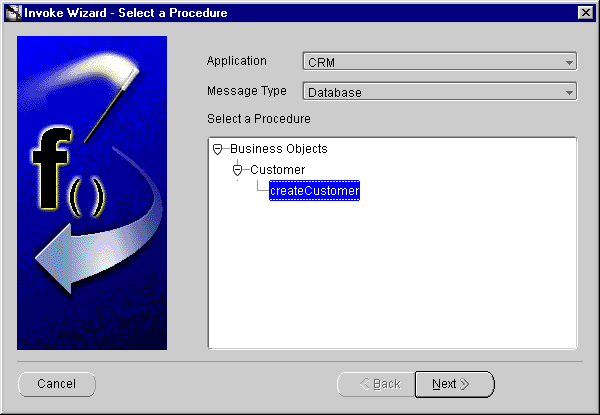
Enter these procedure details:
You can select from the following Message Types:
Database --the adapter picks the message data from the database.
SAP-BAPI --the adapter communicates with the application using BAPI.
IBP --the adapter communicates with the application using IBP.
SAP-IDOC --the adapter communicates with SAP using IDOC.
XML --the adapter communicates with the application using XML.
After selecting the procedure to invoke, you define the application view. The application view window is initially an empty table. You may define the attributes by using the add button, or importing the definitions from a database or an API Repository.
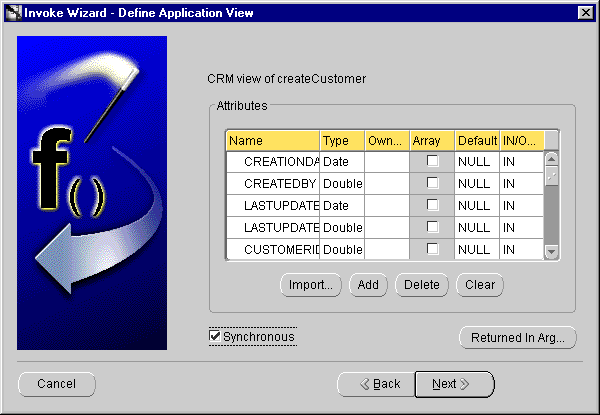
Enter these application view details:
Refer to the section Importing Attribute Information to Import, Add, Delete, Clear the attributes.
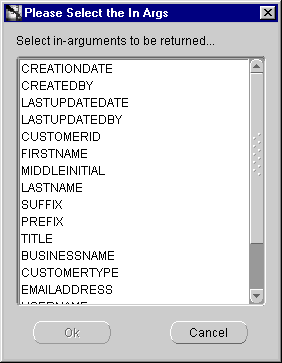
Mapping can either involve copying the individual fields, or simple shape-change transformations.
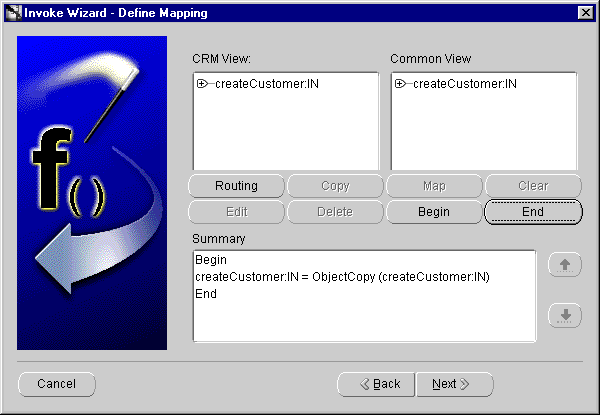
Mapping can either involve copying the individual fields, or simple shape-change transformations. You map the common view return arguments to the application view return arguments in this step.
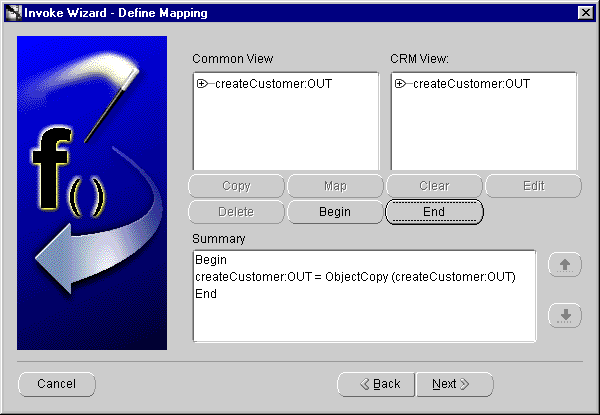
If you selected the Message Type to be a database, the data will be received by a stored procedure. In this stored procedure, you can specify the action to be performed when the values are returned to the application. The adapter will invoke the stored procedure at runtime with the appropriate data.
The following arguments will be returned:
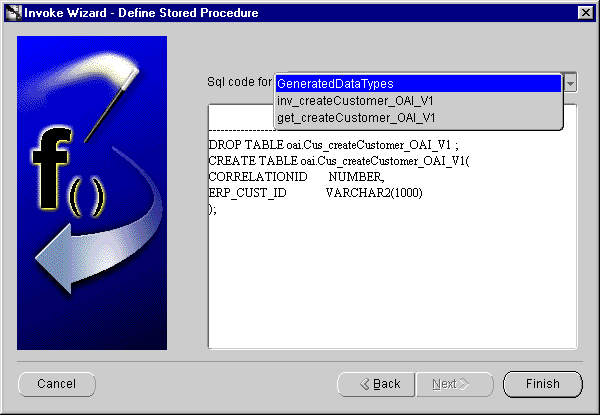
Enter the stored procedure details as follows:
The procedure invoke message is created.
To implement a procedure, select Procedure in the iStudio main menu panel, and click Implement in the pull-down menu. The Implement Wizard is displayed: (Figure 2-36)
The Implement Procedure Wizard navigates you through these steps:
The steps are described in detail in the following sections.
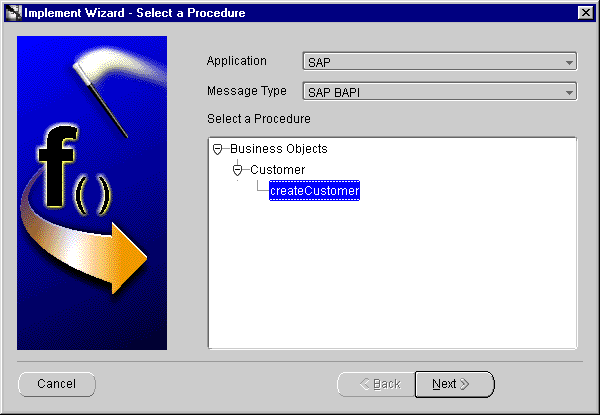
Enter these procedure details:
You can select from the following Message Types:
Database --the adapter retrieves the message data from the database.
SAP-BAPI --the adapter communicates with the application using BAPI.
IBP --the adapter communicates with the application using IBP.
SAP-IDOC --the adapter communicates with SAP using IDOC.
XML --the adapter communicates with the application using XML.
After selecting the procedure to implement, you define the application view. The window is initially an empty table. You may define the attributes by using the add button, or importing the definitions from a database or an API Repository.
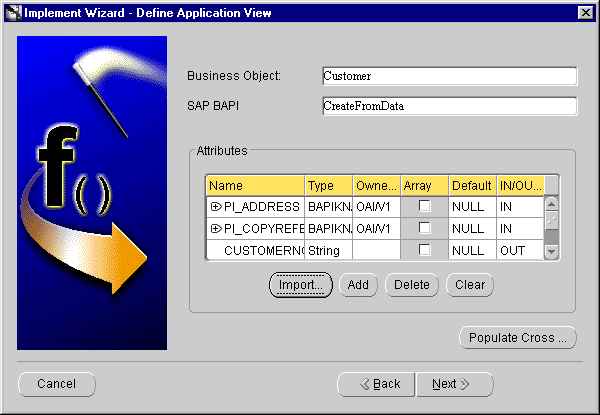
Enter these application view details:
Refer to the section Importing Attribute Information to Import, Add, Delete, Clear the attributes. If you are importing BAPI information the SAP log in window is displayed: (Figure 2-38)
Click Populate XRefT, and a dialog is displayed: Enter the name of the Cross Reference Table. To populate and look up Cross Reference tables, refer to the section Populating Cross Reference Tables .
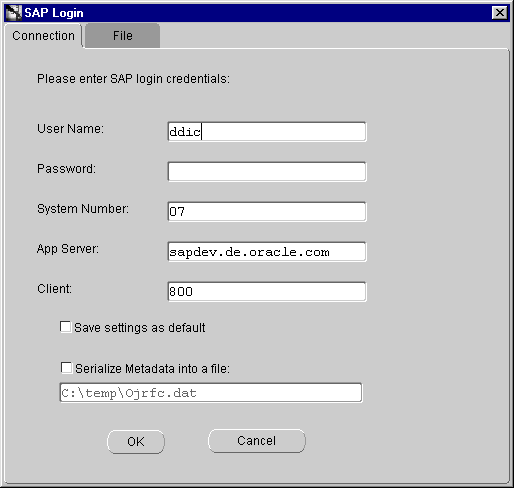
Enter the SAP log in information as follows:
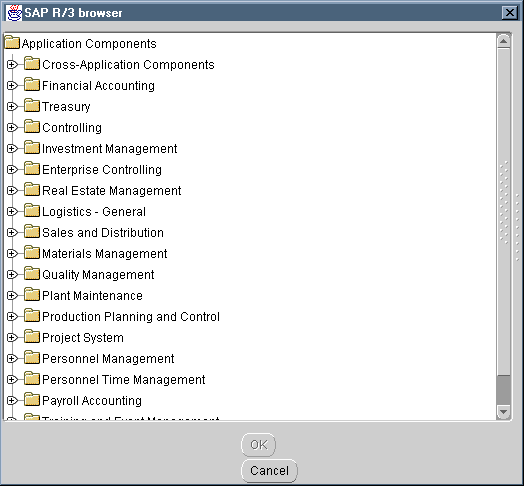
Mapping may involve copying individual fields, or simple shape-change transformations.
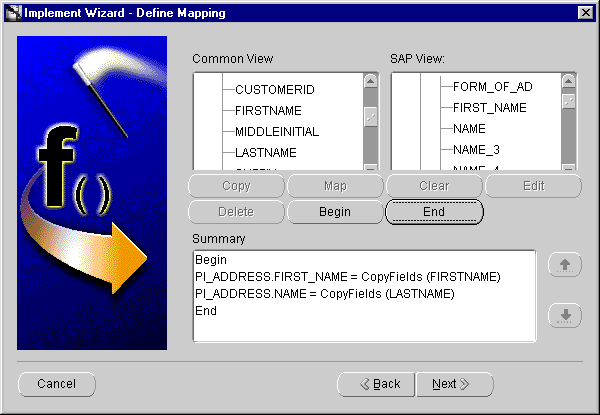
Refer to Mapping Attributes to map and Copying Attributes to copy attributes.
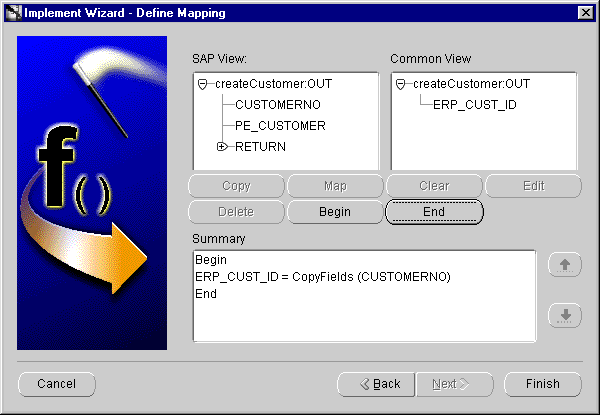
Refer to Mapping Attributes to map and Copying Attributes to copy attributes.
The procedure implement message is created.
iStudio generates stored-procedure stubs to enable an application to interface with the Applications InterConnect run-time easily. These stubs are exported to a file using the export functionality.
To export stored-procedures, select File in the main menu, then click Export. The Export Application dialog box is displayed: Figure 2-42
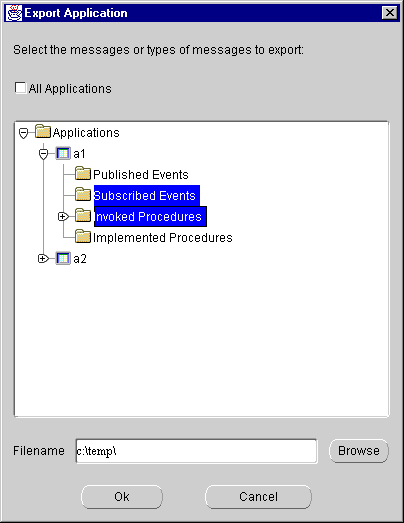
In the Export Application dialog box, you can choose which messages to export stored procedures. Messages may be filtered in any of the following ways:
To select more than one message or class of messages ^click the application.
The stored-procedure is now exported.
|
|
 Copyright © 1996-2000, Oracle Corporation. All Rights Reserved. |
|