Release 2.2
Part Number A77075-01
Library |
Product |
Contents |
Index |
| Oracle WebDB Tutorial Guide Release 2.2 Part Number A77075-01 |
|
![]()
![]()
Estimated completion time: 45 minutes
This chapter shows you how to design your WebDB site. You'll learn how to design a site's structure, control its style, and provide access to its contents.
You should complete this chapter if you are a WebDB site administrator or you are the owner of one or more folders in a WebDB site.
This chapter includes the following sections:
| Section | |
|---|---|
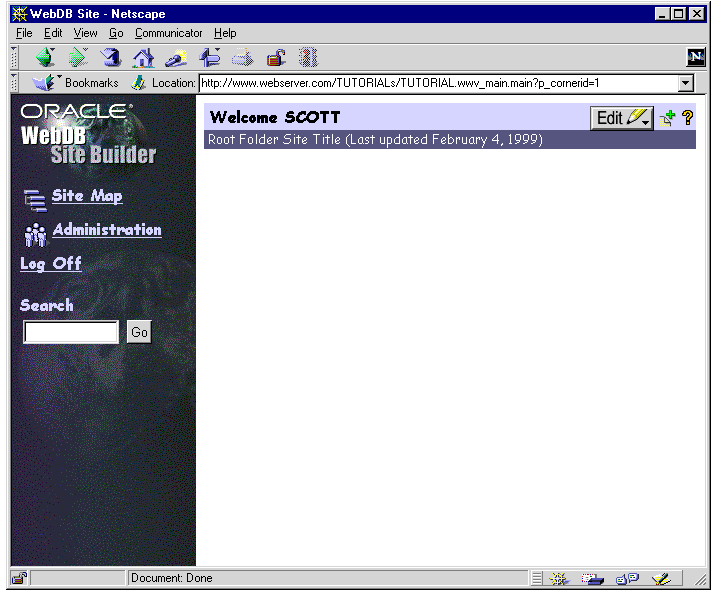
To modify a WebDB site, you need to be logged on to the site. If you have not already logged on to the Tutorial Web Site, follow the instructions in "Oracle WebDB Basic Concepts, Displaying an Oracle WebDB Site" to do so now.
IMPORTANT:
The structure of your WebDB site determines how easily users can find the information they need.
A WebDB site is divided into folders. A folder is a collection of related items, including files, URLs of other Web pages, and WebDB components. For example, The Traveler demo includes folders for Africa, Americas, and Europe. Dividing your Web site into these distinct areas means you can structure your site, and organize content logically. This makes it much easier for site users to find the information they need. You can make folders containing general information accessible to anyone who displays the site and restrict access to folders containing sensitive information to specific users who must first log on to the site.
Each folder has a folder owner, who is responsible for the content of that folder. Delegating responsibility in this way means that each folder is maintained by someone who is familiar with the information and is able to keep that information accurate and up-to-date.
Site administrators can create folders anywhere in the WebDB site. Folder owners can create folders within the folders they own.
Let's create a folder to contain general information about the products offered by your company. For the purposes of this tutorial, let's create this folder in your personal folder.
The page displayed is divided into two panels. For this exercise you will use the Create Folder panel.
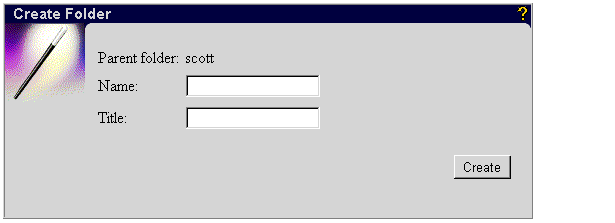
PRODUCTS<NAME>, where NAME is your own user name.
For the purposes of this tutorial, you add your own user name to the end to give this folder a unique name and to identify it as one created by you, rather than one created by another tutorial user.
Products.
In the navigation bar, click![]() to display the Administration page.
to display the Administration page.
CONFIDENTIAL<NAME>, where NAME is your own user name.
For the purposes of this tutorial, you add your own user name to the end to give this folder a unique name and to identify it as one created by you, rather than one created by another tutorial user.
Confidential.
You will add items to the Confidential folder in Chapter 7, "Managing WebDB Site Content".
All Regular items added to a WebDB site are assigned to a category. A category is a grouping of items that answers the content-specific question, "What is this item?" For example, The Traveler demo includes categories for Flights, Lodgings, and Restaurants. Categories provide a way of further organizing the content of a WebDB site, so that users can quickly and easily find the information they want. An item can be assigned to only one category.
If you cannot see the Category link, you are probably not a site administrator of the Tutorial Web Site. Ask your DBA or site administrator to set you up as a site administrator. Instructions for assigning users as site administrators are provided in Appendix A, "Tutorial Setup Instructions".
Note:
The page displayed is divided into two panels. For this exercise you will use the Create Category panel.
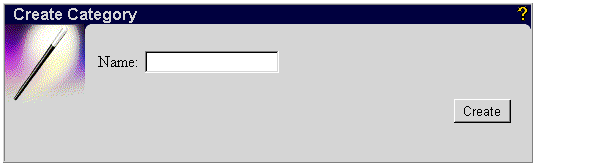
Tutorial Items <NAME>, where NAME is your own user name.
For the purposes of this tutorial, you add your own user name to the end to identify the category as one created by you, rather than one created by another tutorial user.
When a contributor adds an item relating to the tutorial, the item can be assigned to the Tutorial Items category.
You will assign an item to a category in Chapter 7, "Managing WebDB Site Content".
Each item added to a WebDB site can optionally be assigned to one or more perspectives. A perspective is a cross-folder, cross-category grouping of items that answers the question "Who will be interested in this item?" For example, The Traveler demo includes Beach, Safari, and Skiing perspectives.
The page displayed is divided into two panels. For this exercise you will use the Create Perspective panel.
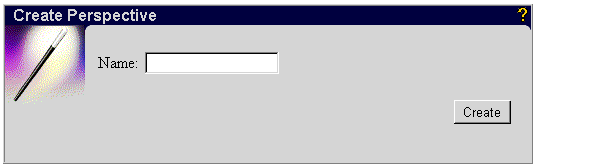
Tutorial Users <NAME>, where NAME is your own user name.
For the purposes of this tutorial, you add your own user name to the end to identify the perspective as one created by you, rather than one created by another tutorial user.
When a contributor adds an item that would be of interest to tutorial users, the item can be associated with the Tutorial Users perspective. Tutorial users can view the site by the Tutorial Users perspective, or can search for items associated with the Tutorial Users perspective.
You will assign an item to a perspective in Chapter 7, "Managing WebDB Site Content".
An item type defines the display and functional characteristics of items that a contributor adds to a WebDB site. WebDB sites support the following item types: URL, File, Text Item, Imagemap, Folder Link, WebDB Component, and PL/SQL Call. You can also add many files at once (up to 10) to the WebDB site by adding them as Multiple Files. In addition, you can create your own custom item types, which enable you to customize the existing item types to make them map more specifically to the items you include in your site.
Let's create a custom item type that enables users to add notes about a text item and to specify a string to pass to a search engine.
The page displayed is divided into two panels. You will first use the Create Custom Item Type panel.
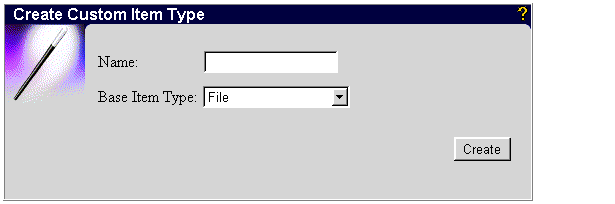
Tutorial Type <NAME>, where NAME is your own user name.
For the purposes of this tutorial, you add your own user name to the end to identify the custom item type as one created by you, rather than one created by another tutorial user.
When you first create a custom item type, it is exactly the same as the base item type. You then edit the custom item type to customize it to meet your specific requirements.
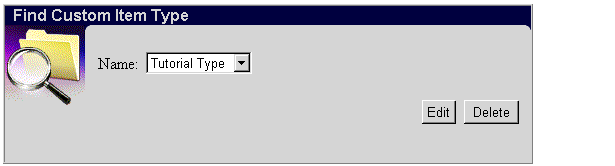
You will now use the Find Custom Item Type panel of the Custom Item Type Manager.
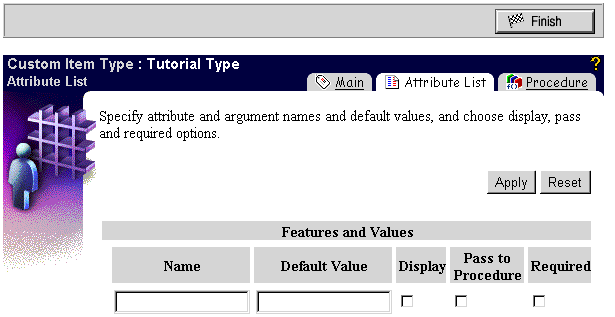
You can use custom item type attributes to enable contributors to add more information about an item, or specify values to pass to a PL/SQL or HTTP procedure. In this exercise, you will add two attributes to the Tutorial Type custom item type: one to enable contributors to add notes about the item and one to specify values to pass to a search engine.
Notes.
A field labeled Notes will be added to the Optional page of the Item Wizard and Item Manager for this type of item.
p.
A field labeled p will be added to the Required page of the Item Wizard and Item Manager for this type of item.
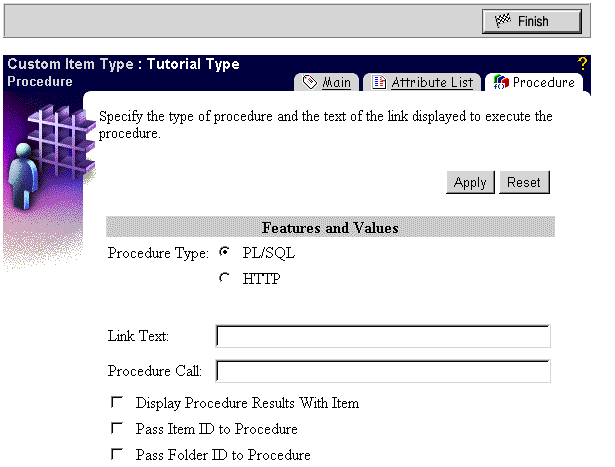
Search
This text is displayed as a hypertext link next to the item title. When an end user clicks the text, a call is made to the procedure using the value specified in the p field when the item was added.
http://search.yahoo.com/bin/search?p=
When a contributor adds an item, the item can be added as a Tutorial Type item. The contributor must specify a search string and can optionally add notes about the item which other users will be able to view when they edit the item. End users can click on the link next to the item title to search for other Web sites and Web pages that contain the search string.
You will create an item of this type in Chapter 7, "Managing WebDB Site Content".
The style of your WebDB site determines how the site looks. Site and style administrators can create styles that control the location and appearance of the navigation bar and the text, color, and images used in the site. Folder owners can choose an existing style to apply to their folders. In addition, site administrators can grant folder owners privileges to create their own styles.
The following exercise shows you how to use the Style Manager to create a style to control the appearance of a WebDB site. The exercise illustrates some of the style options. For more information about any of the other options in the Style Manager, click the small question mark![]() to access field-level help.
to access field-level help.
The page displayed is divided into two panels. You will first use the Create Style panel.
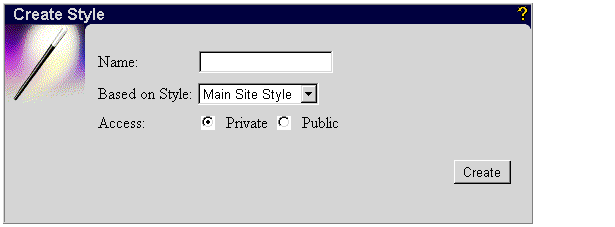
tutorial style <NAME>, where NAME is your own user name.
For the purposes of this tutorial, you add your own user name to the end to give this style a unique name and to identify it as one created by you, rather than one created by another tutorial user.
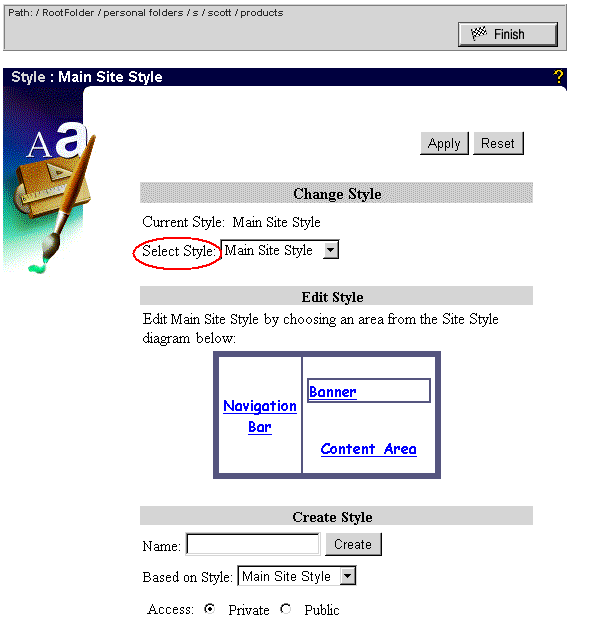
Using a base style provides you with a starting point. The new style will be created with the same settings as Main Site Style. You then edit the new style and change the settings to your own preferences.
The style will be available only to you. Once you have finished designing the style, you can make it available for other folder owners to use, if desired.
You will now use the Find Style panel of the Style Manager.

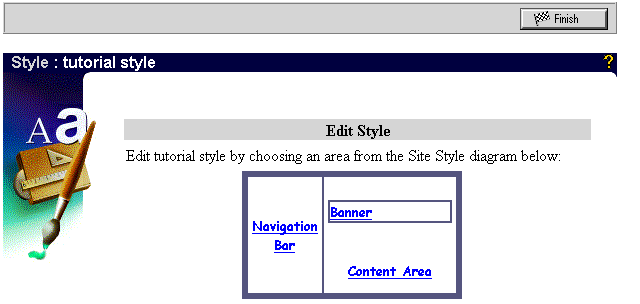
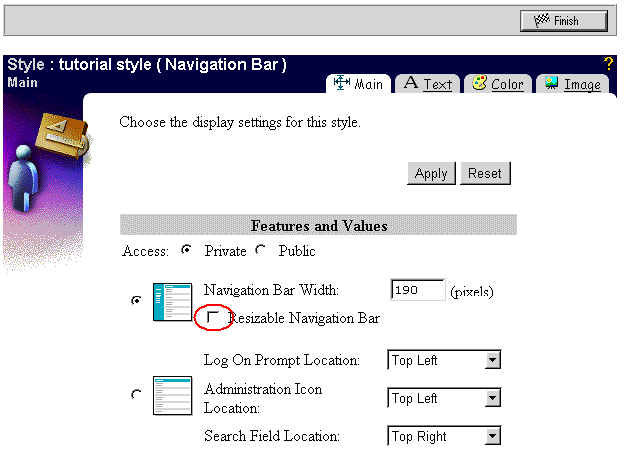
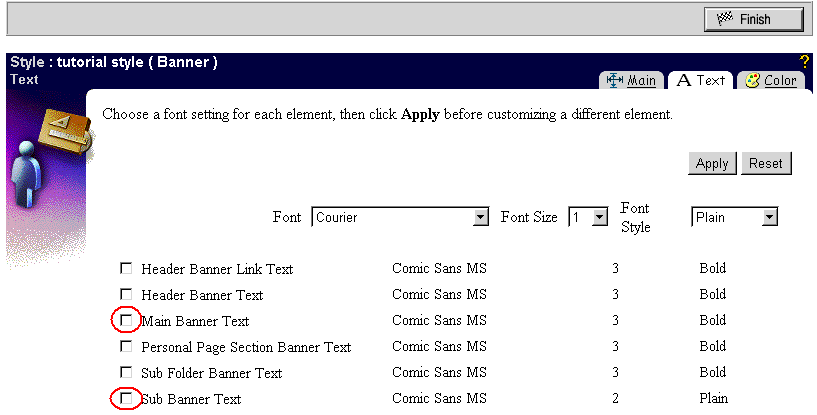
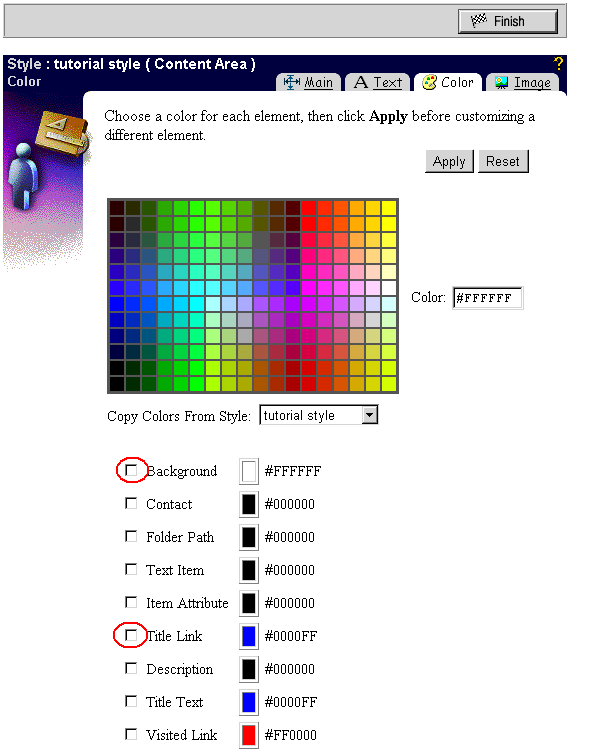
In the Style Editor you click the area of the site on the Site Style diagram for which you want to change the style settings: Navigation Bar, Banner, or Content Area.
At the moment, the folders you created in Section 6.2, "Designing the Structure of a WebDB Site" use the Main Site Style. Let's apply the style you just created to the Products folder.
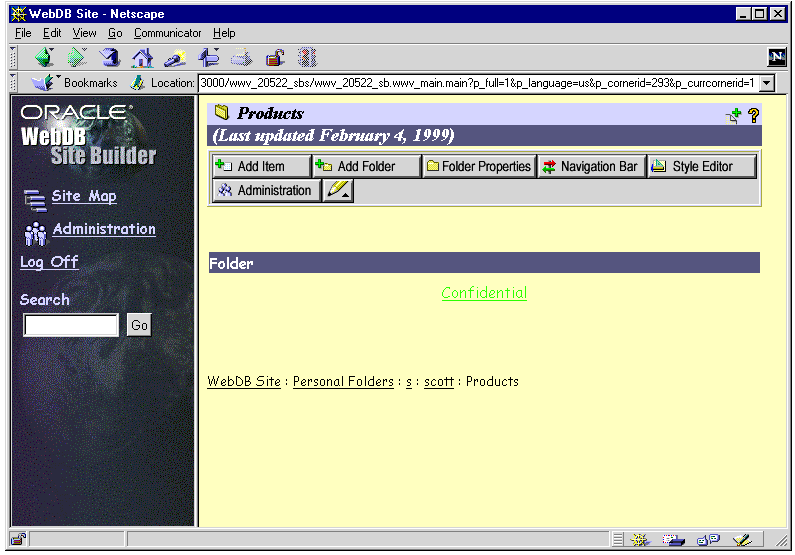
The Products folder now uses the style you specified in tutorial style: the text in the banners at the top of the page is the font you specified, title links in the content area are green, and the content area itself is light yellow.
When end users first display a WebDB site, they can only view items in public folders.
For greater access to the site, users must log on to the site using their database user name and password.
Once users are logged on to the site, the tasks they can perform on a folder depend on the privileges they have been granted for that folder.
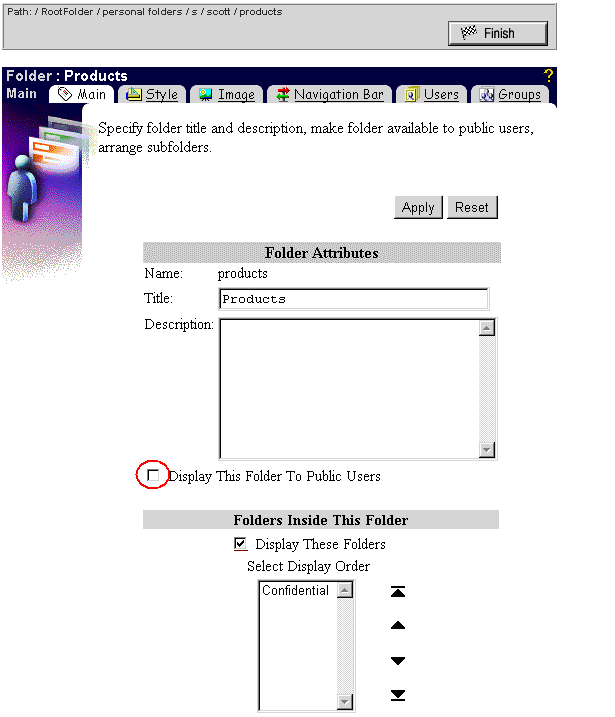
You want your company's customers to be able to view items in the Products folder. To make the items in a folder available to all users, including those who are not logged on to the site, you must make the folder a public folder.
Let's view the site as a public user to see the how the changes you have made have affected the site. To view the site as a public user, you need to log off the site.
If you do not want everyone be able to access the items in a folder that you own, you must grant the appropriate access privileges only to the users you do want to have access. For example, if the information in your folder is of a confidential nature, you might want only a few users to be able to view it. Or, you might want members of your department to be able to add items to a folder.
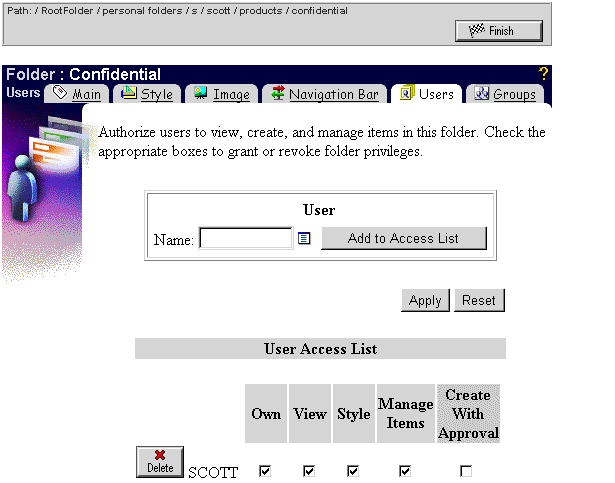
Your company wants to use the Confidential folder in the Products folder to make confidential product information available to its employees, but its customers should not be able to see this information. For now, let's enable a single user (TUTORIAL_USER) to view the items in the Confidential folder.
Log back on to the site using your own user name and password.
|
Tip: If you can't remember how to do this, follow the instructions in "Oracle WebDB Basic Concepts, Displaying an Oracle WebDB Site". |
If TUTORIAL_USER is not listed, ask your DBA or site administrator to create this user for you. Instructions for creating TUTORIAL_USER are provided in Appendix A, "Tutorial Setup Instructions".
Note:
TUTORIAL_USER is displayed in the Name field on the Folder Manager: Users page.
TUTORIAL_USER can now view the contents of the Confidential folder.
Let's view the site as TUTORIAL_USER to see the how the changes you have made have affected the site. To view the site as TUTORIAL_USER, you need to log off the site and then log back on as TUTORIAL_USER.
Sometimes, you may want to grant the same privileges to multiple users. For example, you may want to allow all of the members of your department to add items to your department's folder. Rather than granting each user the Create With Approval privileges individually, you can create a group of users and grant the privileges to all members of the group in a single operation.
First you need to create the group.
Click Log Off in the navigation bar to log off the site as TUTORIAL_USER.
The page displayed is divided into two panels. You will first use the Create Group panel.

tutorial group <NAME>, where NAME is your own user name.
For the purposes of this tutorial, you add your own user name to the end to give this group a unique name and to identify it as the one created by you, rather than one created by another tutorial user.
You will now use the Find Group panel of the Group Manager.
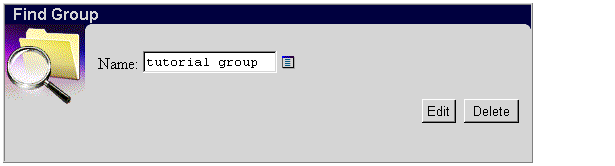
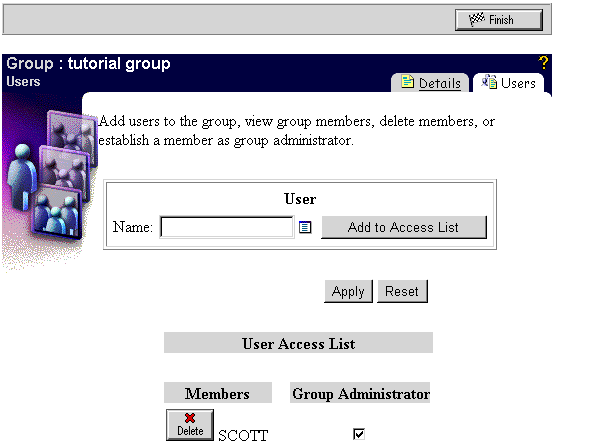
TUTORIAL_USER is displayed in the Name field on the Group Manager: Users page.
To add more users to the group, you would repeat Steps 10 through 12 for each user.
Now that you have created a group, you can grant folder access privileges to all members of this group in a single operation.
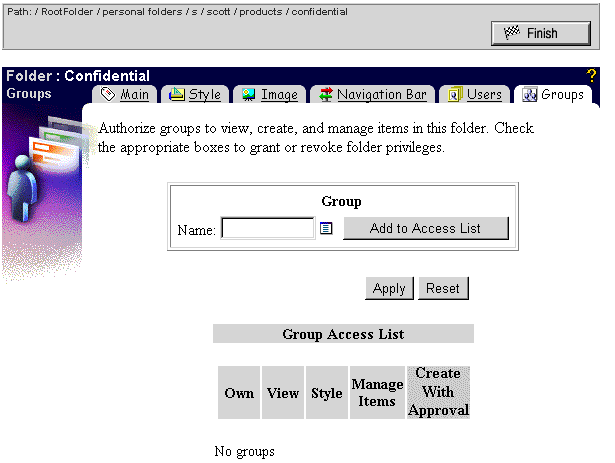
TUTORIAL GROUP <NAME> is displayed in the Name field on the Folder Manager: Groups page.
Members of the tutorial group can now add items to the folder. However, because you only granted the group Create With Approval privileges, these items will not become visible until you, the folder owner, approve them. This enables folder owners to delegate content creation while remaining in control of the information that is contained in the folder.
Let's view the site as TUTORIAL_USER to see the how the changes you have made have affected the site. To view the site as TUTORIAL_USER, you need to log off the site and then log back on as TUTORIAL_USER.
In this chapter, you learned how to:
In Chapter 7, "Managing WebDB Site Content", you will find out how to add items to a site.
|
|
 Copyright © 1996-2000, Oracle Corporation. All Rights Reserved. |
|