Resize Lab helps you to resize objects on a slide in various ways.
Stretching and Shrinking
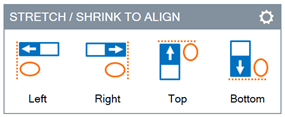
Suppose you want to resize the arrows in the example below,

so that their left edges line up with the left edge of the red arrow.
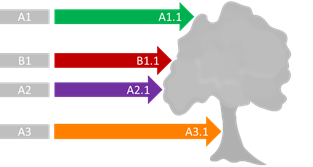
To do that, first select the red arrow (i.e. B1.1), followed by the other three arrows, and click the Left button.

In this example the red arrow (B1.1) was used as a reference object to align other objects to because it was the first object you selected.
Instead of using the first object you selected as the reference object, Resize Lab can use the outermost object as the reference object. To do so, click on the settings icon on the STRETCH TO ALIGN panel and a settings window will appear as shown below.
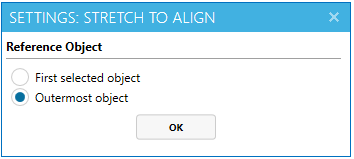
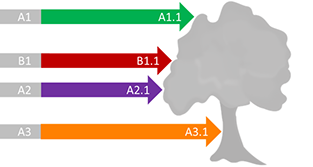
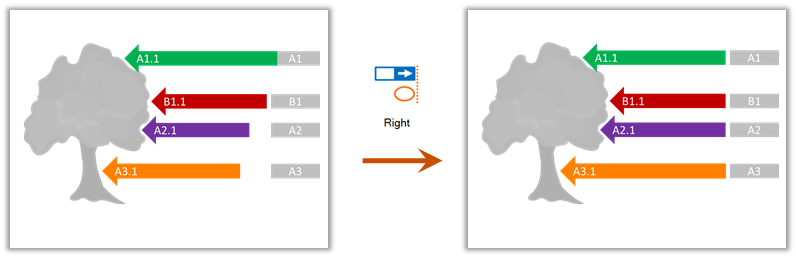
When the "Reference Object" is set to "Outermost object", select the arrows shown below, and click the Left button.

The result will be as below, irrespective of the order in which you select the arrows.The reason is because the green arrow has the leftmost edge and is used as the reference when resizing to the left.
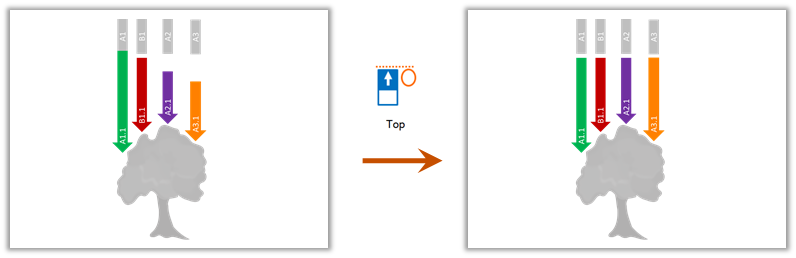
Similarly, you can stretch objects to the right, top, and bottom, using the respective buttons, and the results will be as shown in the examples below.

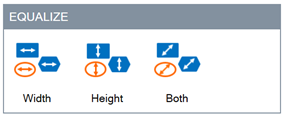
Equalizing Dimensions
Suppose you want to equalize the both height and width of the boxes in the example below,
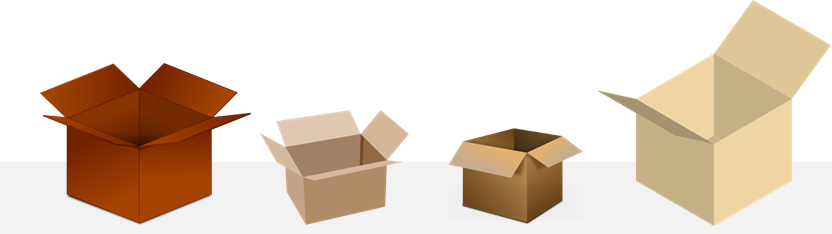
so they have the same size as the third box.

To do that, first select the third box, then ctrl-click to select the other three boxes, and click the Both button.

In this example the second box was used as a reference object to provide dimensions for other objects because it was the first object you selected.
Similarly, you can match either height or width of objects, using the respective buttons, and the results will be as shown below.
Fitting an Object to Slide Area

Suppose you want to resize the square in the example below,
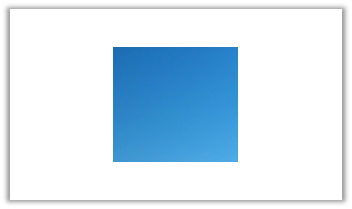
so that it fills up the width of the slide.
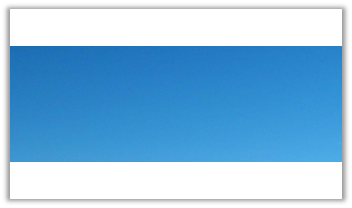
To do that, select the square, and click the Width button.

You can also resize multiple objects by selecting them before clicking on the button.
Similarly, you can resize objects’ height or both height and width, using the respective buttons, and the results will be as shown below.

Adjusting an Object Size Slightly
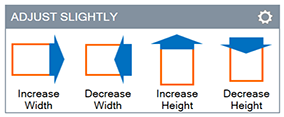
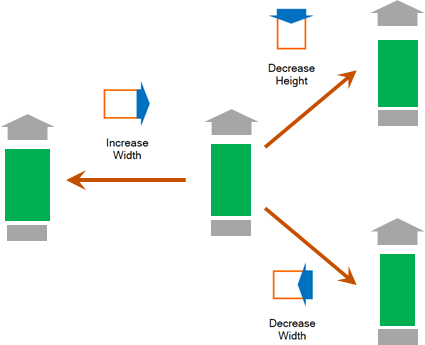
Suppose you want to resize the green bar in the example below, so that its height increases precisely by an amount.

To do that, select the green bar, and click the Increase Height button.

To set the amount by which the size increase/decrease, click on the settings icon on the ADJUST SLIGHTLY panel, which opens up the dialog given below.
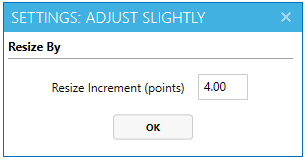
When you increase the value (to 4 in this example), and increase the height of the green bar again, the result will be as below.

You can also resize multiple objects by selecting them before clicking on the button.
Similarly, you can increase or decrease objects’ height and width using the respective buttons, and the results will be as shown below.
Matching One Dimension to the Other
Suppose you want to resize the smiley face below,

so that its height matches its width.

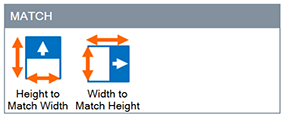
To do that, select the shape, and click the Height to Match Width button.

Similarly, you can also resize the width to match its height instead. Select the shape, and click the Width to Match Height button,

and you will get the following.

You can also resize multiple objects by selecting them before clicking on the button.
Adjusting Objects Proportionally
Suppose you want to have three giraffe images such that their relative heights match the ratio 1980 : 2870 : 3911, as shown below.
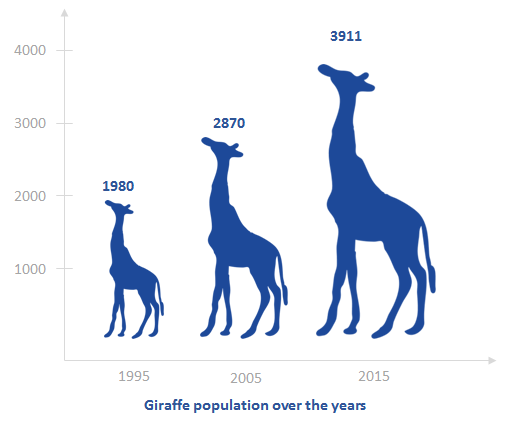
To do that, first select the first giraffe, followed by the second and third giraffe, and click the Height button.

This will open up a dialog box as shown below.
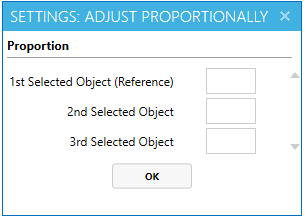
Enter the respective proportions, and click OK.
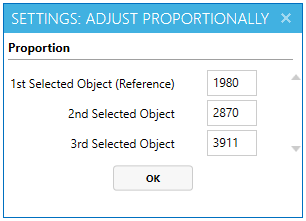
The objects will be resized accordingly. In this example the first giraffe was used as a reference object to resize other objects because it was the first object you selected. The reference object will not be resized. The second giraffe’s height is increased by about 1.4 (i.e. 2870/1980) times, while the third giraffe’s height is increased by about 2 (i.e. 3911/1980) times. This is because proportions entered for non reference objects (second selected objects onwards) will have their dimensions resized based on the dimension of the reference object. In other words, entering ‘1’ for the reference object and ‘2’ for a non reference object is equivalent to entering ‘3’ and ‘6’ respectively.
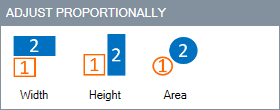
Similarly, you can resize width or area of the objects proportionally using the Width or Area button respectively.
Note: Adjust area proportionally does not work for grouped objects and objects of different type or shape.
Main Settings
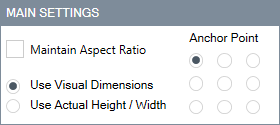
Aspect Ratio
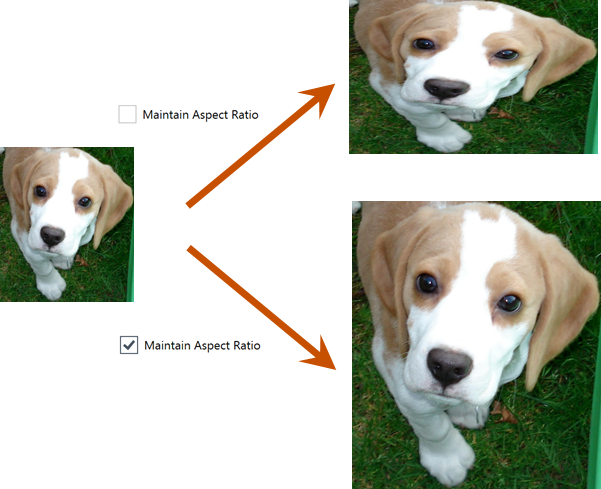
Maintain Aspect Ratio allows you to lock the aspect ratio of objects if you want to resize objects’ height and width proportionally to its original size. When this option is checked, all resize functions within Resize Lab and PowerPoint will resize objects proportionally.
The following example shows how the setting affects an image’s width being increased.
Note: Aspect ratio will not be locked for objects that are being resized using
Equalize BothandMatch.
Anchor Point
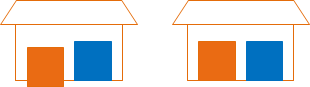
Suppose you are trying to make the orange door in the shape below to be the same size as the blue door. As you know, you can use the Both button in the EQUALIZE panel here.

However, applying that feature could give you the result given on the left below instead of your desired result on the right: while you have the right size for the orange door, the shape ended up in a position different from where you wanted it to.
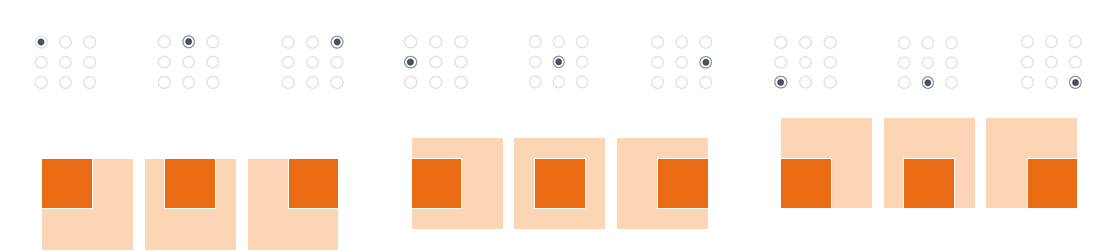
The Anchor Point setting will help you to get the intended result above. It allows you to specify which point of an object you want to stay ‘anchored’ to the slide (i.e. the point that should not move during resizing) when Resize Lab resizes it. There are nine points you can anchor -- an object’s top left, top, top right, left, center, right, bottom left, bottom and bottom right.
The following illustration shows how each anchor point setting affects the resizing of a square object.
Note: Anchor Point is not applicable to
Stretch/Shrink.
Resize Type
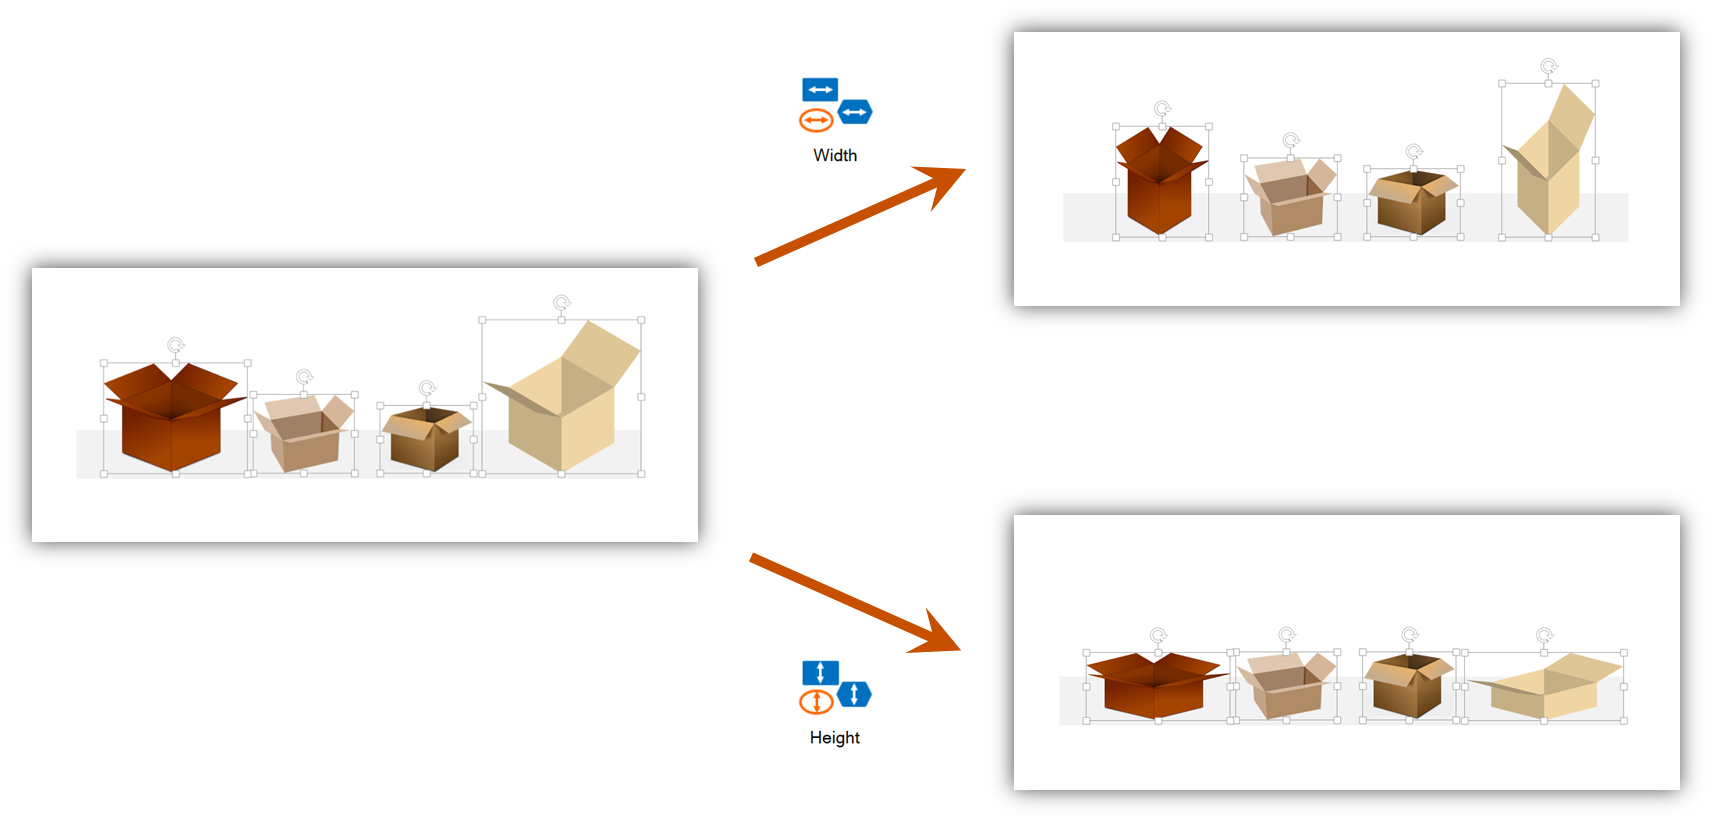
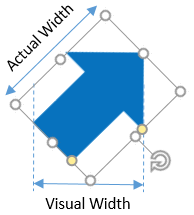
Suppose you have the following rotated arrow:
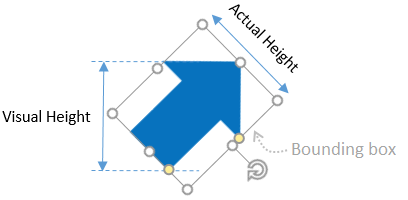
Visual height, as the name implies, can be defined as the height which spans from the bottommost point to the topmost point of the shape. Actual height on the other hand, will be the height of the bounding box (i.e. the rectangle surrounding the shape when it is selected), or the height of the shape when it is not rotated. The figure below shows the actual height of the arrow when it is rotated at various angles.

This applies to visual and actual width as well.
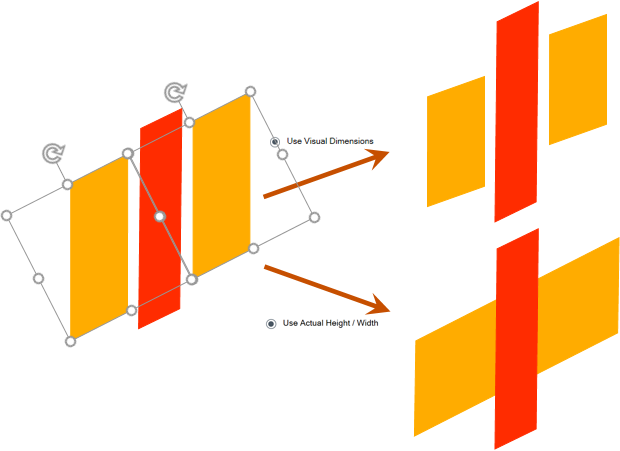
There are two ways objects can be resized - using an object’s visual dimensions, or its actual height/width.
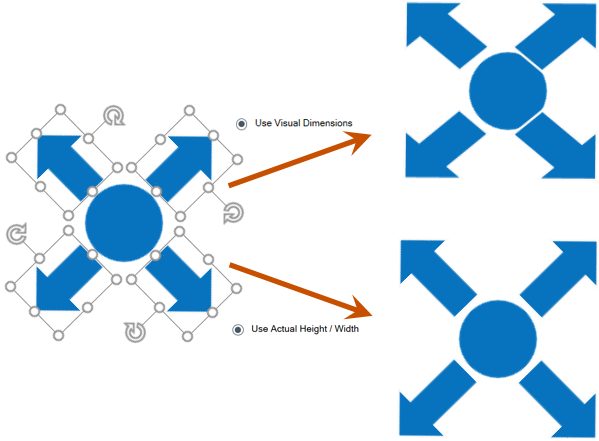
The example above shows four rotated arrows being resized using Increase width and right anchor point. Notice how the Visual Dimensions option expands the arrows horizontally while the Actual Height/Width option expands them along their rotated angles. You will also notice that anchor points appear to work differently in both options. The red circles in the examples below denote the anchor points used when resizing the arrows.

In the example above, notice that the anchor point is at the back of the arrow in Actual Height/Width. This is because the back of the arrow is in fact, the right side when it is not rotated, as shown below.
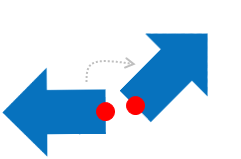
This causes the arrow to grow towards the left side of the arrow, which is the arrowhead, when Increase Width is used. On the other hand, the anchor point is on the point where we perceive the right part of the arrow to be, in Visual Dimensions. The arrow expands towards the left in this case.
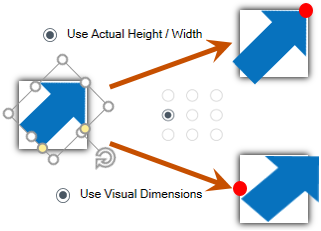
Likewise, when left anchor point is used in the above example, the anchor point is at the arrowhead in Actual Height/Width, as it corresponds to the left side of the arrow when it is not rotated. Because of this, the arrow grows towards the back part of the arrow, which is the right side of the arrow. Again in Visual Dimensions, the arrow simply expands towards the right as the left portion of the arrow is anchored.
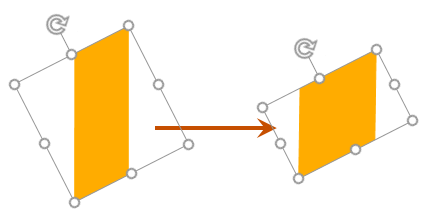
In the next example (given above) the Visual option gives a better result. In this example, Decrease Height was used to resize the yellow shape using the center anchor point. Note that when the Visual Dimensions option is used, the height decreases vertically whereas when using the actual height/width, the height decreases at the rotated angle. The example below shows the yellow shape being resized using Actual Height/Width.
Note: Resizing using visual height/width will result in some of the shape’s properties to be lost. This may result in text within rotated shapes to be displayed in its unrotated position. Resizing with visual height/width is not applicable to
Adjust Area Proportionally. Resizing with actual height/width is not applicable toStretch/ShrinkandFit To Slide.
Previewing results
You can preview the result of a Resize Lab function by hovering your cursor over the respective button while pressing down the Shift key on your keyboard.
Note: Previewing is not available for the
Adjust Proportionallyfeature.