E-Learning Lab (eLL for short) enables you to add supplementary explanations (explanations for short) to PowerPoint slides. An explanation item can have the following elements:
A synthesized audio explanation: eLL uses text-to-speech techniques to generate an audio explanation from the text you provide i.e. there is no need to record your own voice.
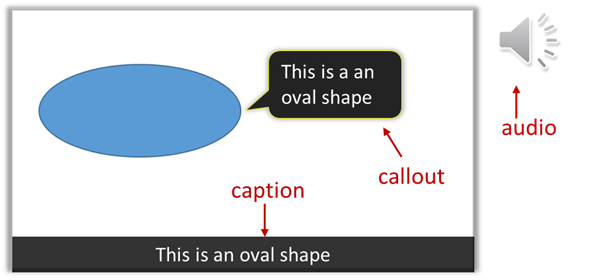
A caption: a text explanation that is placed at the bottom of the slide
A callout: a text explanation that is placed near the element in the slide that being explained

Adding such explanations to slides is particularly useful when creating e-Learning resources from slides e.g., self-study slides or e-Learning videos.
- Here is an example self-study slide deck that has such explanations.
Adding explanations
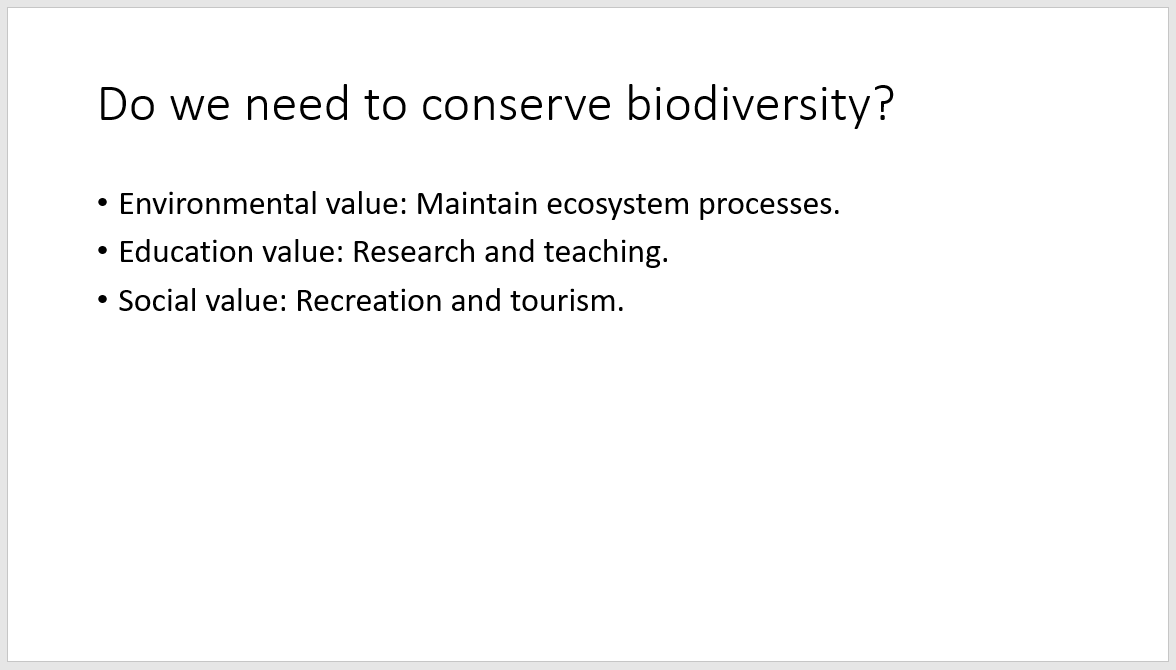
To learn how to use eLL, let us walk through a scenario of adding explanations to a slide. Suppose you have a slide like this (see screenshot below) that has a list of bullet points that appear one after the other and you want to add explanations to each bullet point.
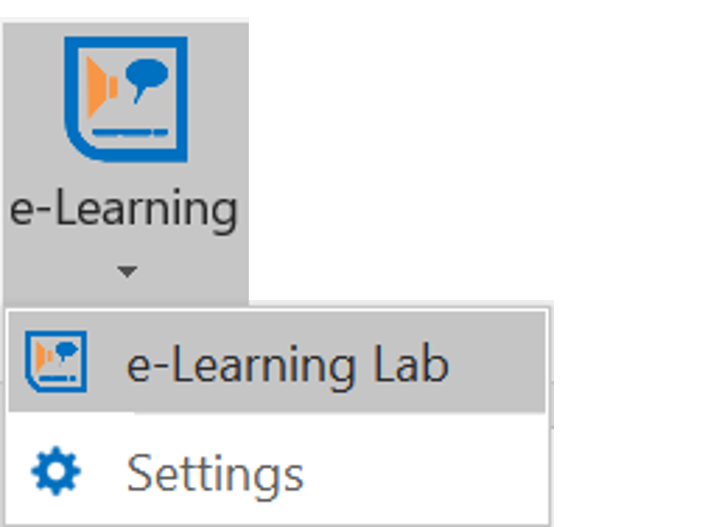
First, open the eLL by clicking on the E-Learning button on PowerPointLabs ribbon.
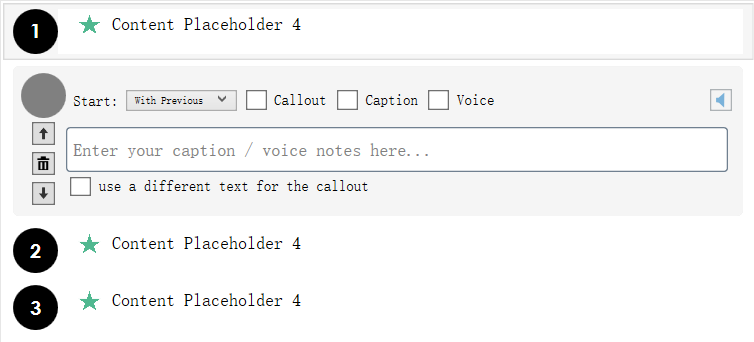
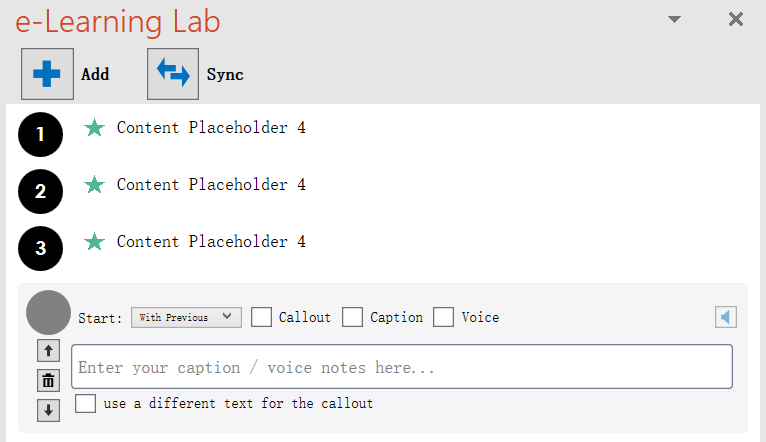
You should see something like this.
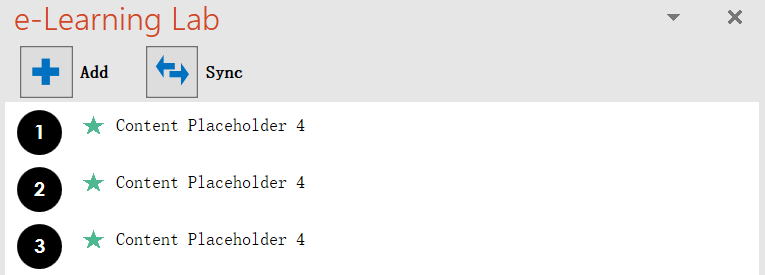
The items you see in the eLL task pane are animations that already exists in the slide (i.e., those used to animate the three bullet points). The number on each item corresponds to the click number under which the animation should appear e.g., the first bullet point appears after the first click.
To add an explanation to the first bullet point, right click on the first item in the eLL task pane and select Add Explanation Below
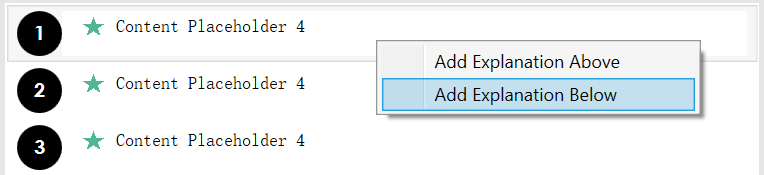
An empty explanation item will be created below the item numbered 1.
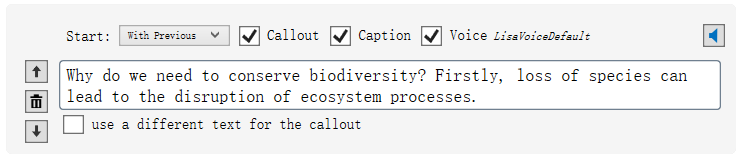
Type some text into the empty textbox and tick the Callout, Caption and Voice checkboxes.
Next, click on the Sync button on the top of eLL task pane to synchronize the new explanation we added with the slide.
You will notice that a callout, a caption and an audio has been added to the slide and corresponding animations have been created on PowerPoint’s Animation Pane. Note that callout is added to a random location in the slide; you can move/resize it as you wish.
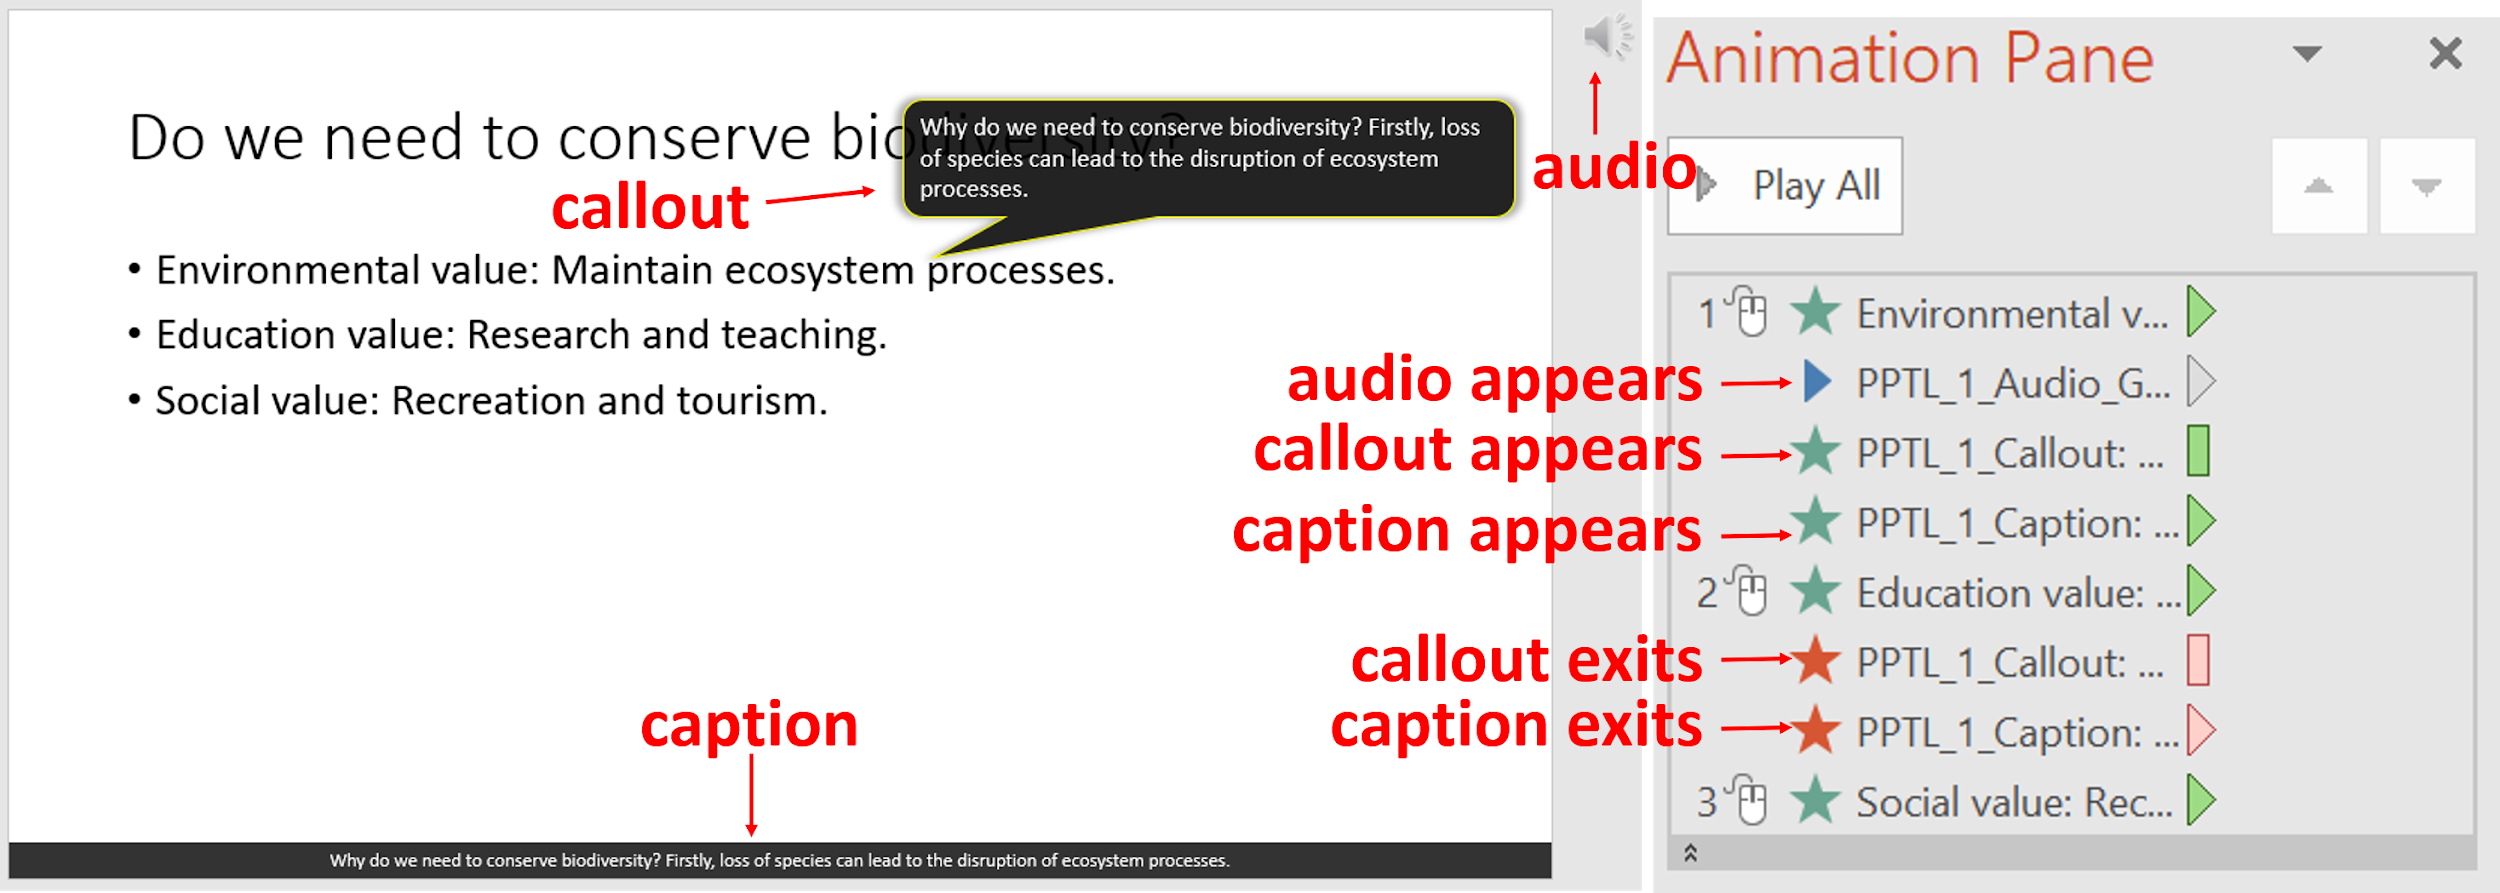
Now, try playing the slide in presentation mode and observe how the explanation appears together with the first bullet point.
Congratulations! You have just added an explanation to your slide!
You can similarly add explanations to the remaining bullet points, or attach an explanation to any animation step in any slide.
Note:
You can add multiple explanations to a slide without syncing after each addition. But you should
syncbefore moving onto a different slide.To change the words of a caption/callout/audio, simply edit the corresponding text in the eLL task pane and
sync. If you edit the text in the callout/caption shapes, those changes will be lost when you sync the next time.
Other Features
Customizing the appearance of explanations
By default, callouts and captions have the following appearances:
You are free to customize them in any way (e.g., change font size/color) and eLL will try to preserve those formattings at subsequent updates to the callout/caption.
Not only that, if you customize an existing callout/caption format on a slide, the same format will be automatically copied over to all subsequent callouts/captions you add to that slide.
Adding more voice options
By default, eLL uses text-to-speech voices that comes with your Windows. However, it is possible to use the following additional voice options in eLL.
Microsoft Azure Speech services -- refer to the Adding Microsoft Azure Speech Services for instructions.
IBM Watson Speech Services -- refer to the Adding IBM Watson Speech Services for instructions.
User Interface
E-Learning Lab Task Pane
The main UI of eLL is shown below.
There are two types of items on eLL. Normal item is a group of regular animations that cluster under the same click number on the animation pane. An example custom item has the following UI:

Custom items are shown for reference only. You will not be able to add/edit them using the eLL. They should be managed using the normal PowerPoint features.
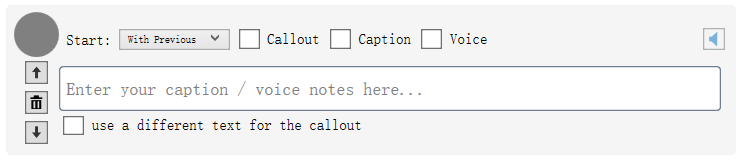
The main job of the eLL task pane is to help you manage explanation items. An example is shown below:
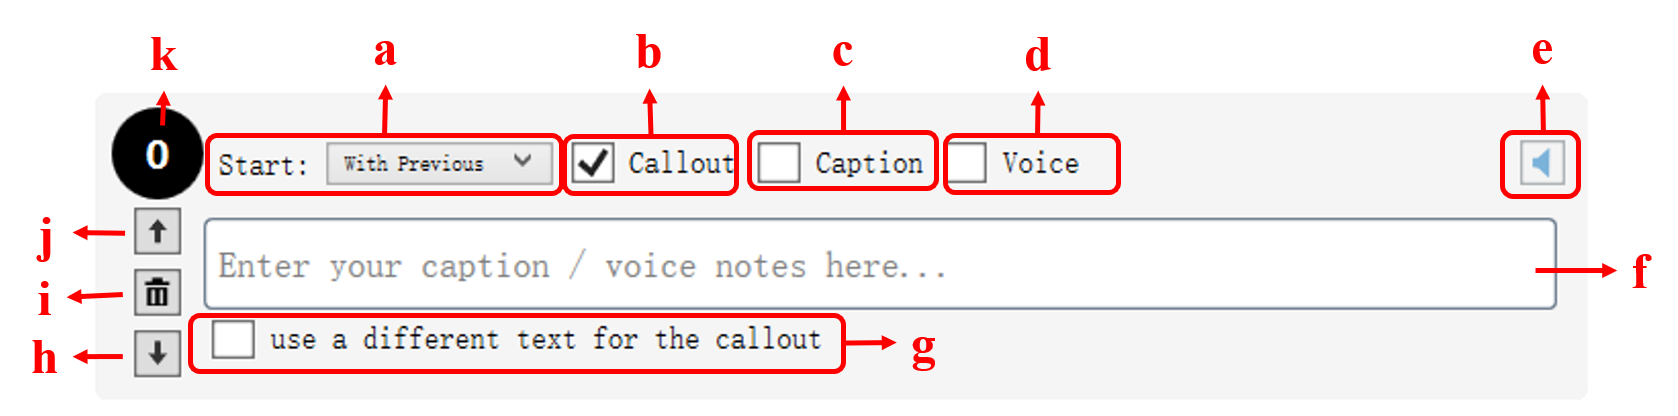
a. Animation trigger: Use this to control when the explanation will appear.
On Click: The explanation appears upon a click by the userWith Previous: The explanation item appears together with the item that is above it in the eLL task pane.
b. Callout checkbox: Tick the callout checkbox to create a callout for this explanation.
c. Caption checkbox: Tick the caption checkbox to create a caption for this explanation.
d. Voice checkbox: Tick the voice checkbox to create audio for this explanation.
e. Audio preview button: Click on this button to open Audio Preview Window as shown below which allows you to:
Preview different voices for the same text
Select the best voice for the explanation item
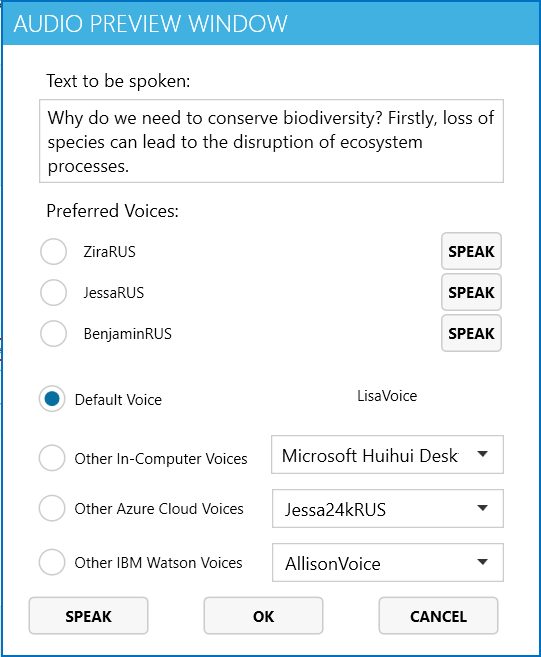
To preview the audio for a preferred voice, click the speak button next to it. To preview other voices, select the voice (using the radio button and drop-downs) and click on speak button at the bottom. Click OK to confirm you selection.
f. Caption textbox: Type your text for callout/caption here.
g. Use a different text for the callout: Tick this checkbox if you want callout to have a different text from the caption/audio.
When you tick it, another text box will appear for you to fill in the text for the caption.
h. Move down button: Use this button to move the explanation down in the animation order.
i. Delete button: Use this button to delete the explanation item.
j. Move up button: Use this button to move up the explanation button up in the animation order.
k. Click number label: Indicates the click number for the explanation item.
If an explanation item has trigger type
With Previous, then it will not have any click number as it will be attached to the click of an item above it.If the explanation item has none of the three types
Callout,CaptionandVoiceare ticked, the click number will appear as a grey circle (example given below).
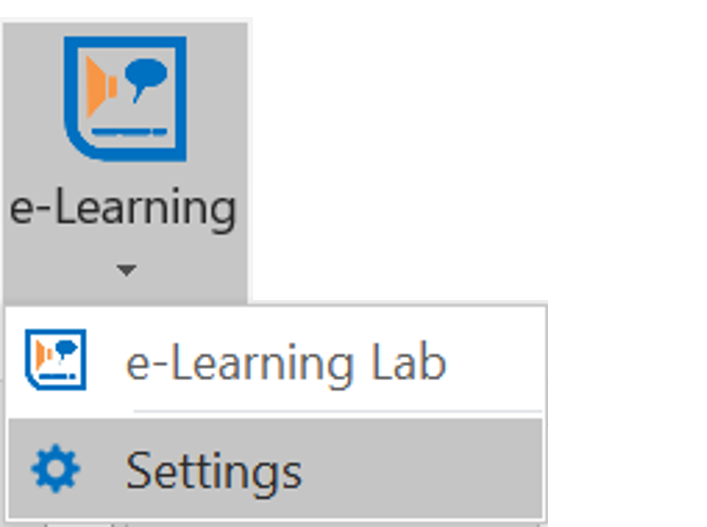
Settings
To open the eLL Settings page, click on the Settings button from E-Learning dropdown menu on PowerPointLabs ribbon.
The following settings page will be shown to user.
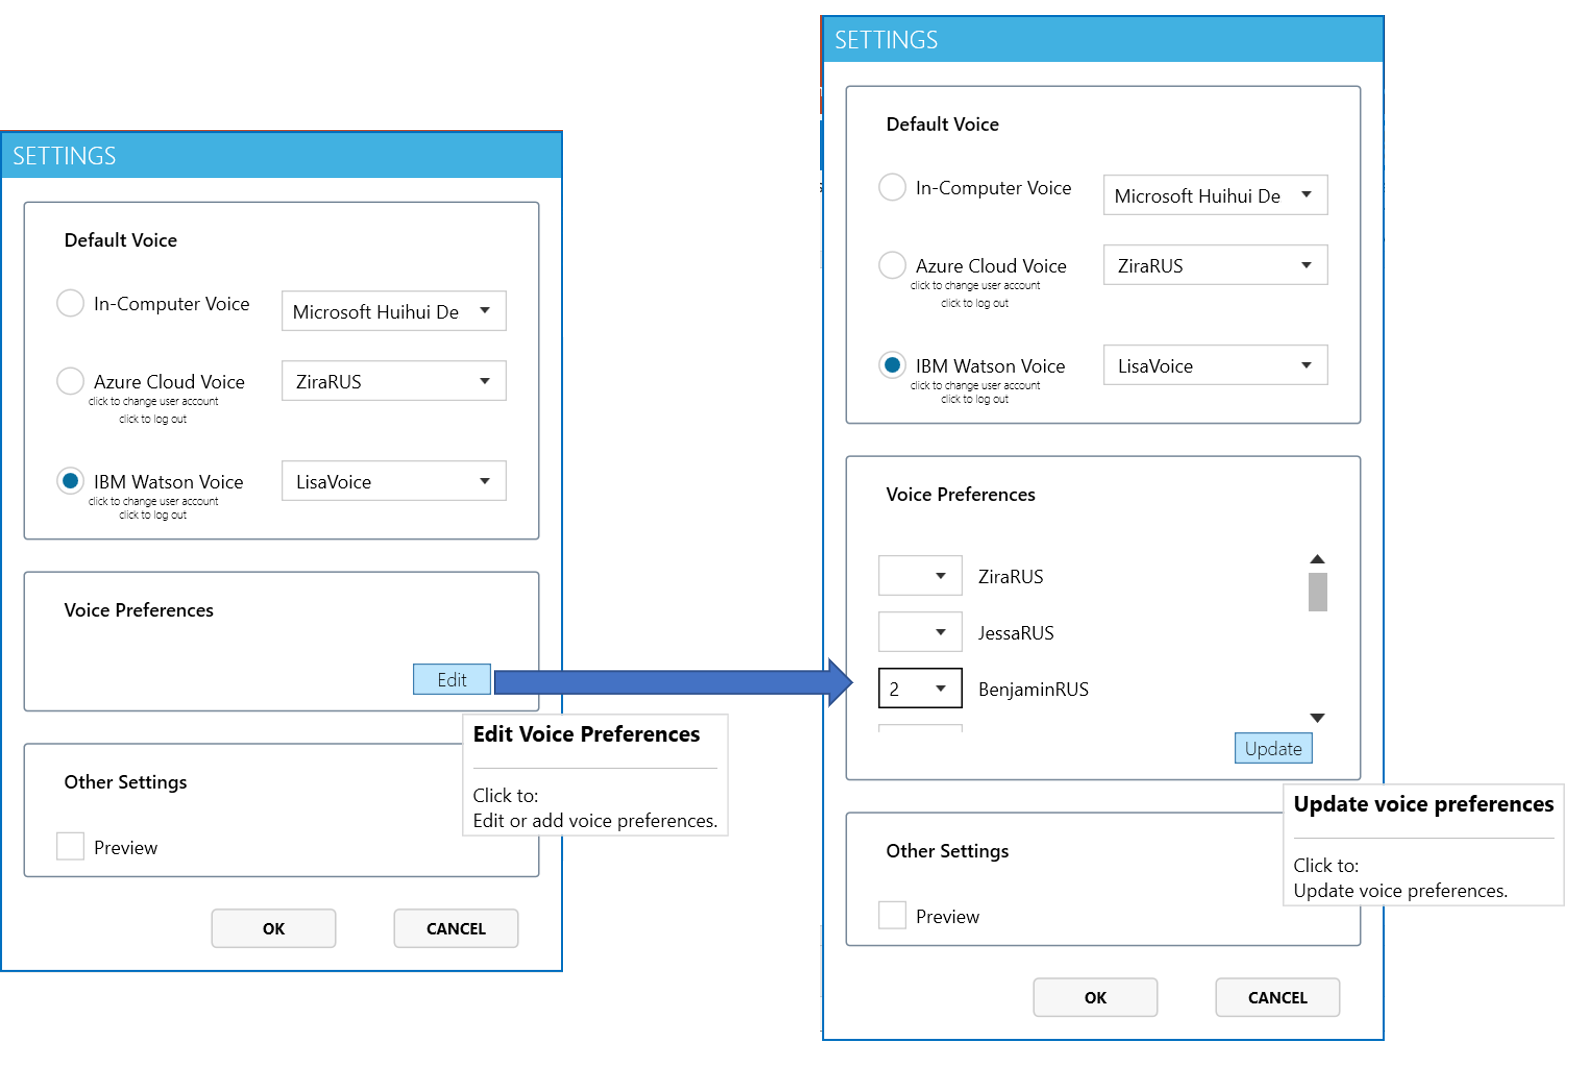
Default Voices:
Use this section to set the default voice for voice generation.
Voice Preferences:
You can also select and rank up to 5 preferred voices (reason: preferred voices are easier to preview when trying to select a voice for an explanation). To set preferred voices, click on the Edit button in Voice Preferences section and rank up to 5 voices as indicated in the diagram above.
Other Settings:
To hear the audio after generating/syncing an audio explanation, tick the Preview checkbox.
Adding Microsoft Azure Speech Services
Step 1. Create an Azure Speech Service Instance
To create an Azure text-to-speech (TTS for short) service instance, there are two options available. The first option creates a free Azure trial for 3 months. While this is the simpler, you will have to create a proper Azure account (i.e., option 2) after the trial expires.
Option 1: Azure Free Trial for 3 months
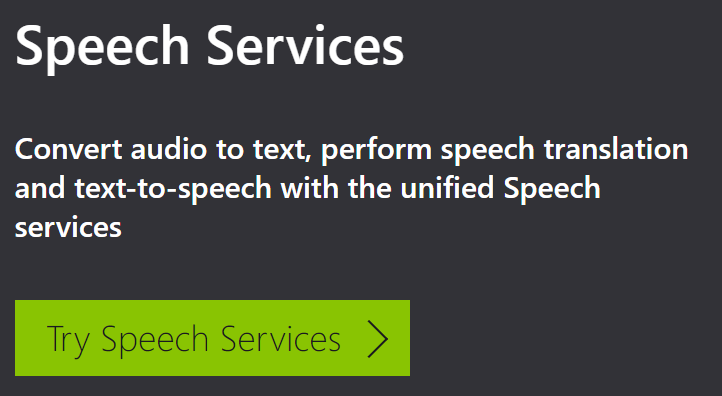
Go to link and click on the green Try Speech Services button.
Click on the blue Get Started button under 7 day trial
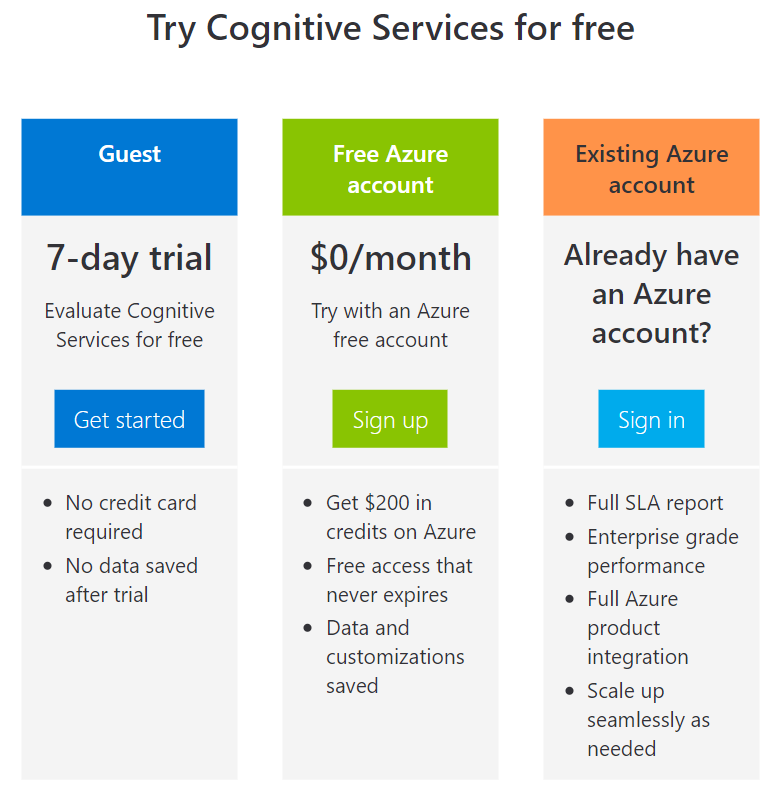
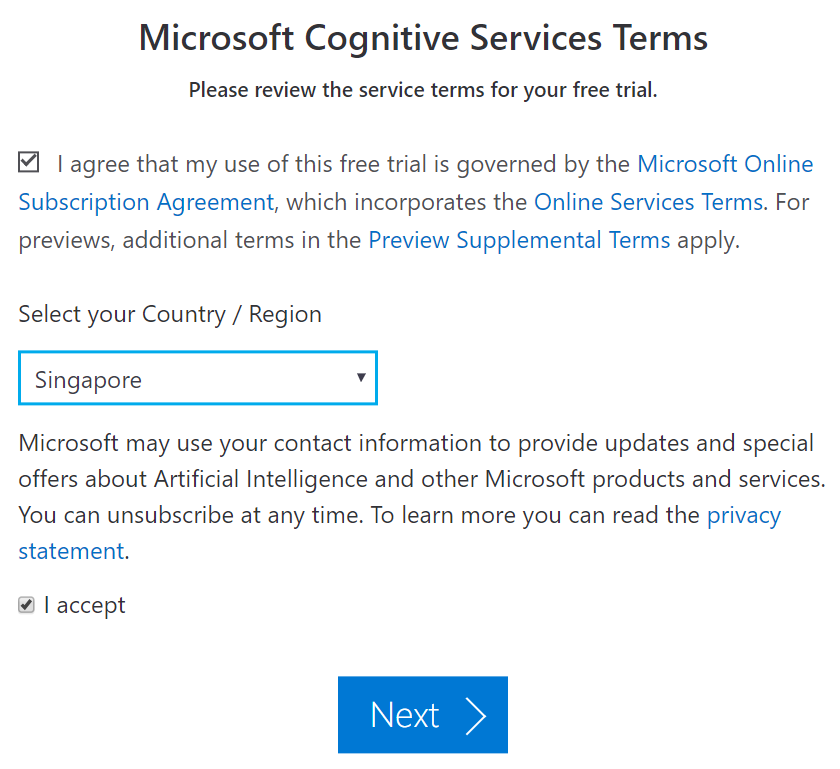
Choose a location and accept terms and conditions.
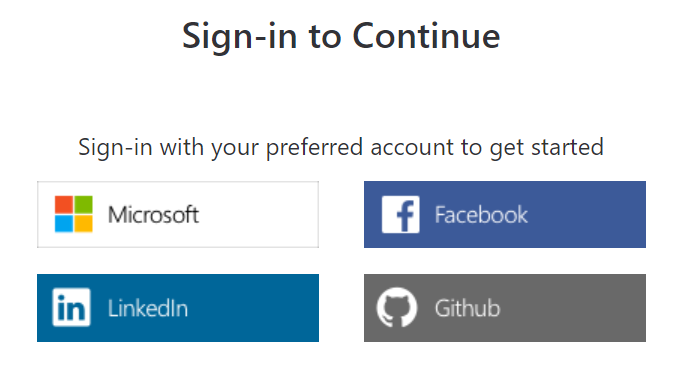
Sign in to Azure cloud services using one of the four options.
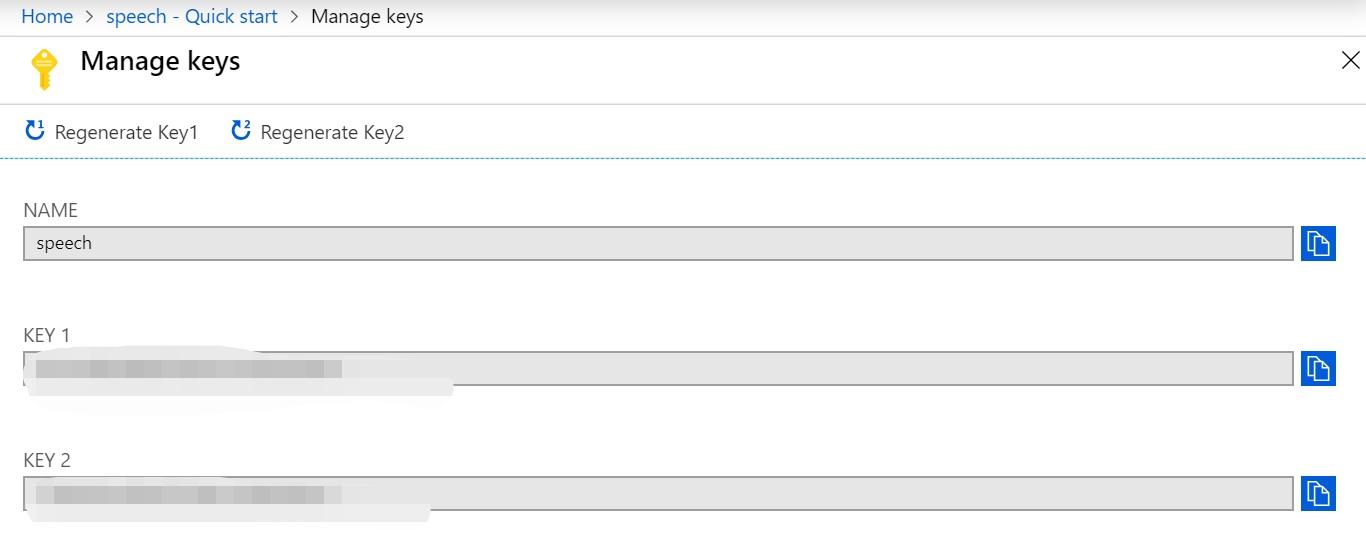
You will be presented with the following screen.
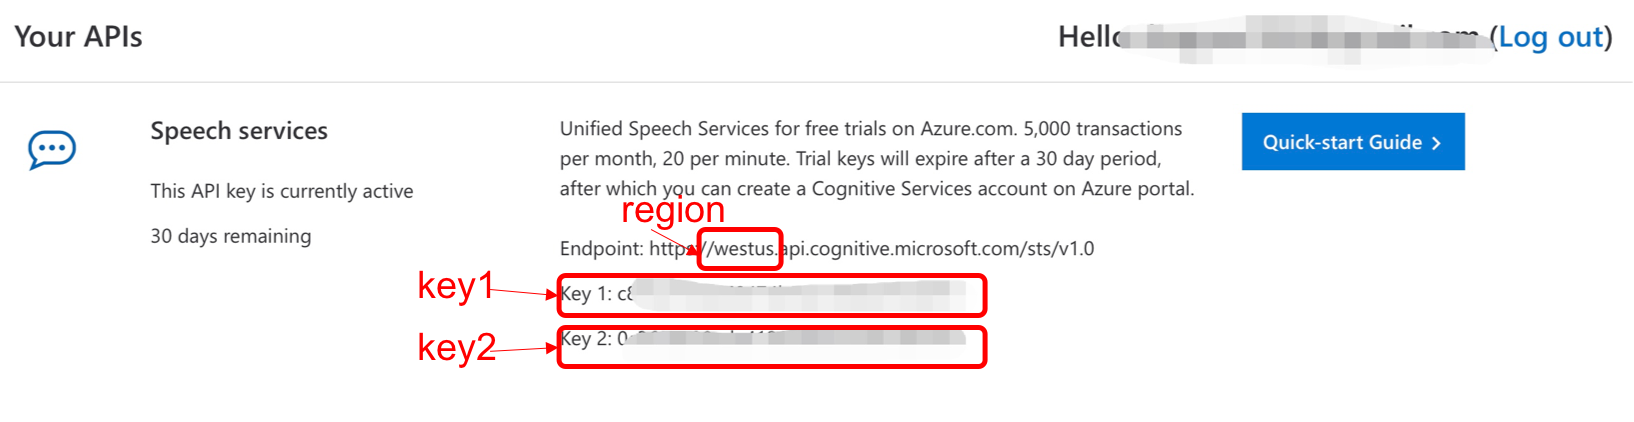
Copy key 1 or key 2. Use this API key to login to Azure account and select the correct region during login.
Option 2: Register for an Azure Account
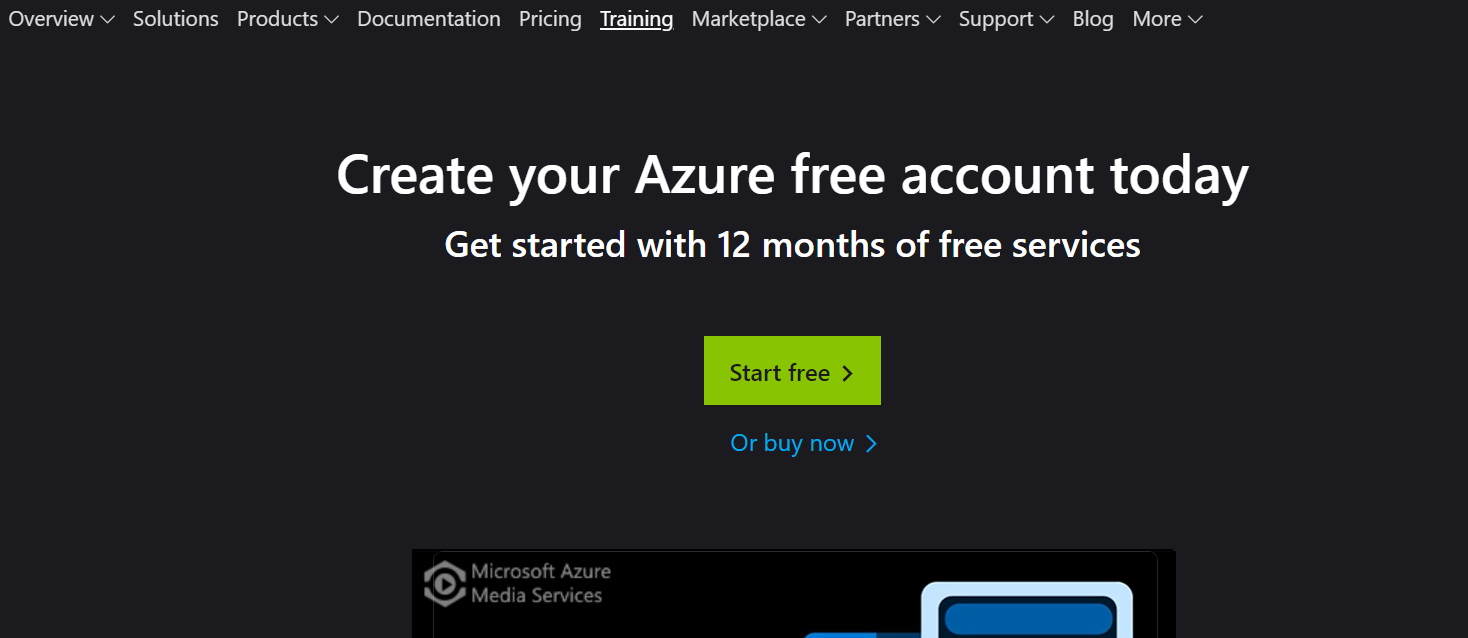
Go to this link and select the green button Start Free.
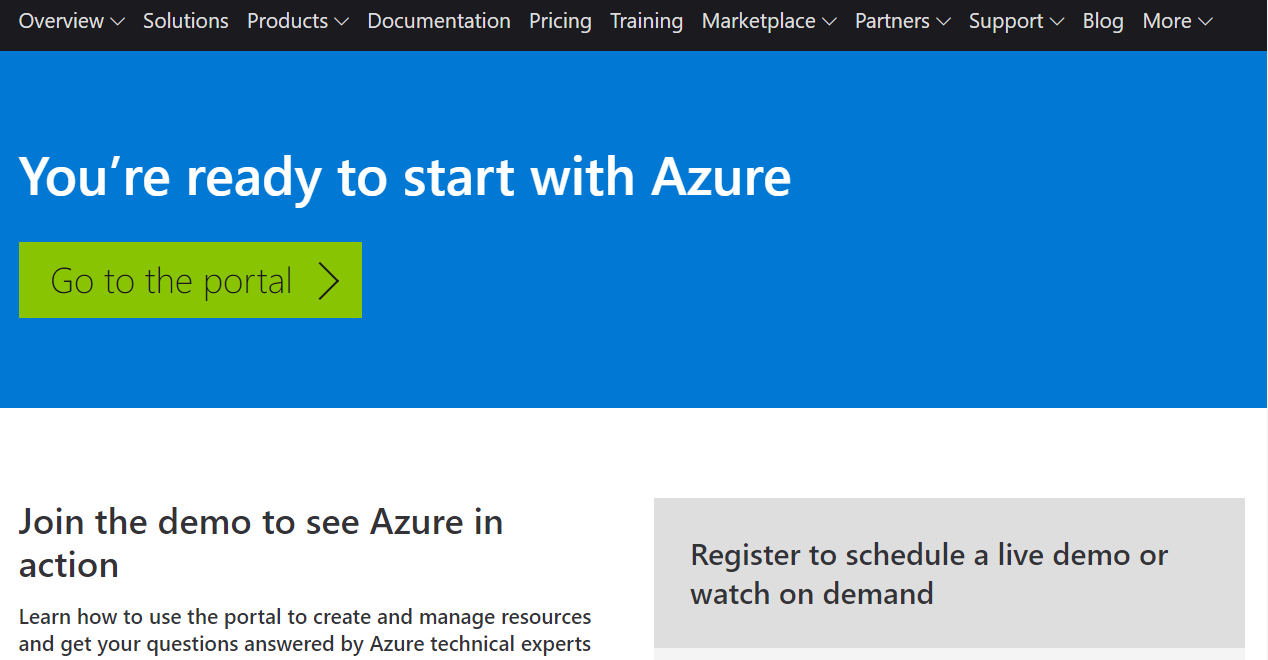
Follow the instructions to create a new Microsoft Account. After you have successfully created your Microsoft account, you will be automatically directed to the page below. Click on the green button Go to the portal.
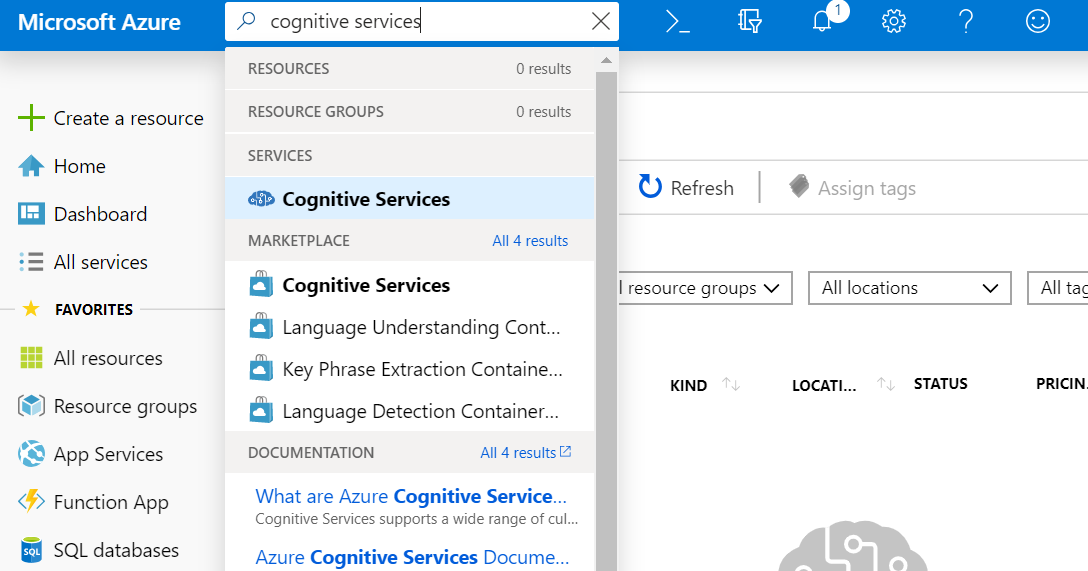
You will be presented with a page similar to the one attached below. Type in Cognitive Services in the search bar and select the Cognitive Service under Services.
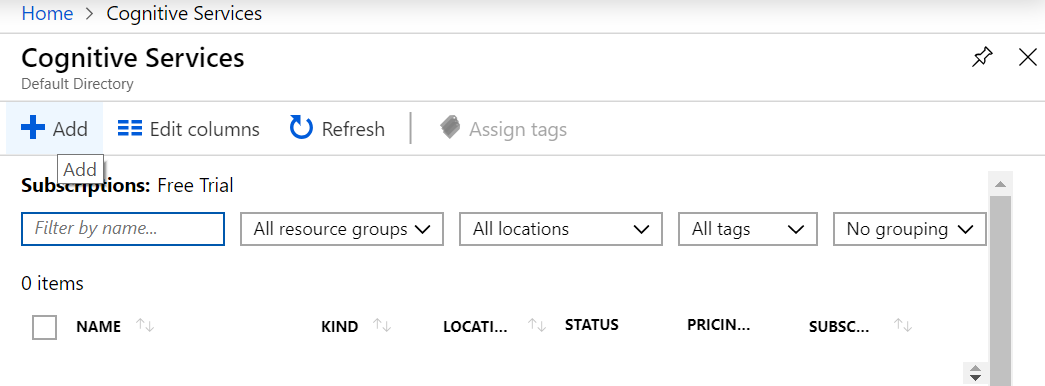
Create an instance by clicking on the Add button under Cognitive Services page.
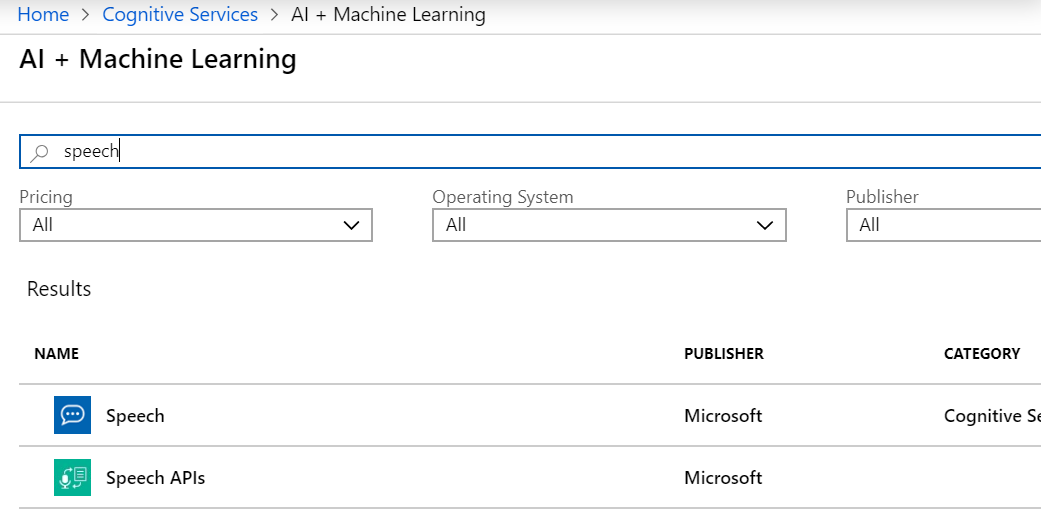
You will be directed to a new page. Type speech in the search bar and select the first result that appears.
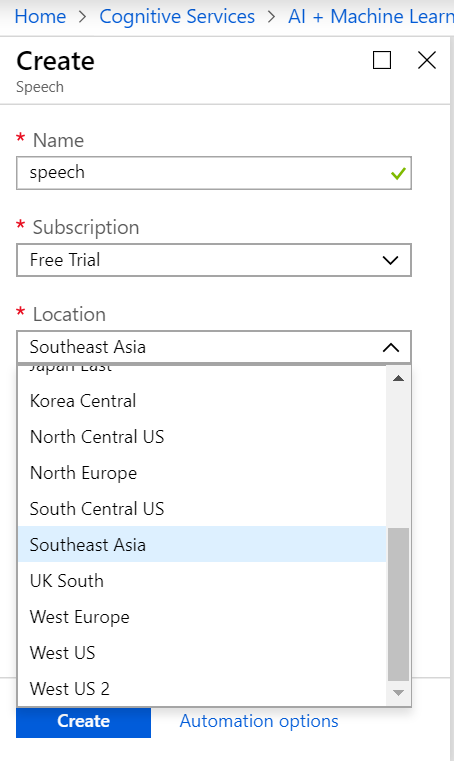
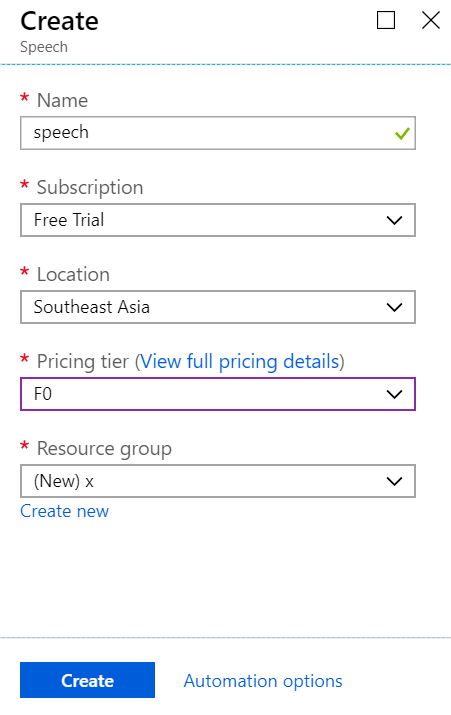
Next you are about to create a new Azure Cloud Services instance. Be sure to choose a location that is near you and select F0 under pricing tier, F stands for free.
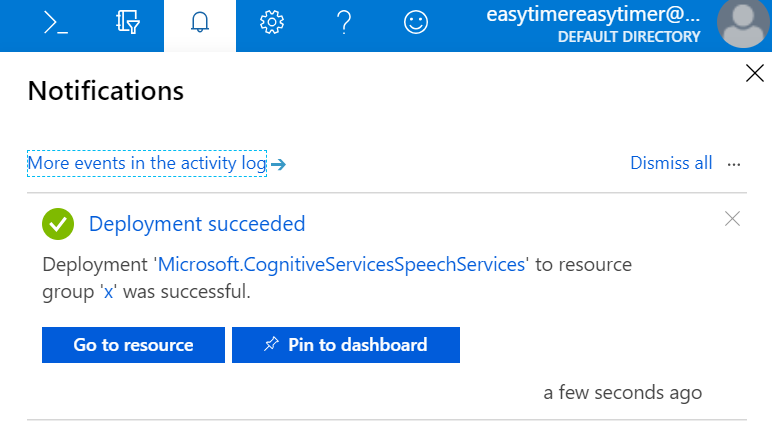
After clicking Create and wait for a few seconds, you will receive a notification telling you that instance deployment is successful. Click on Go to resource button.
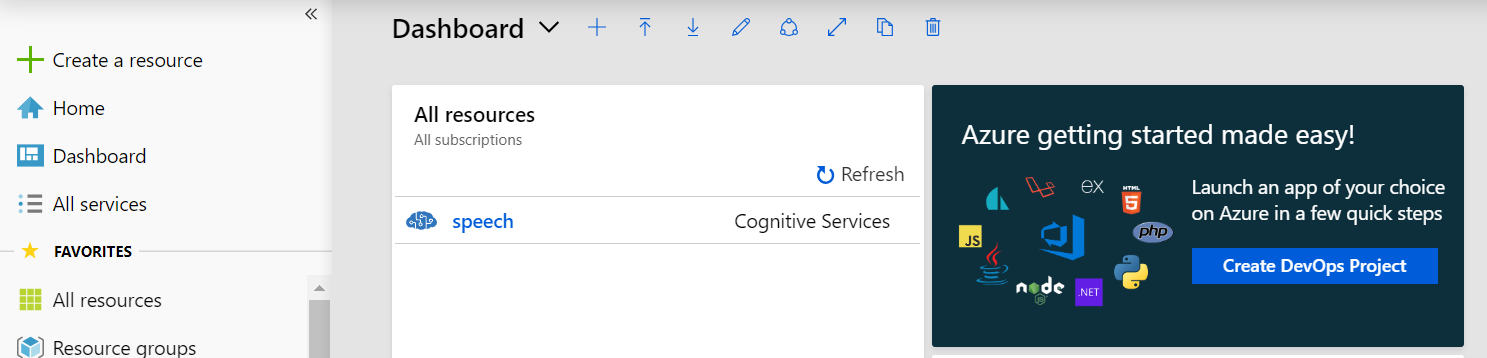
Alternatively, you can also click on Dashboard button and then click on the instance under All resources panel. The instance that you just created will appear below. Note that your instance may have a different name than speech. If you did not see your newly created instance, be sure to wait for a few minutes and refresh the page again.
After clicking on the instance, you will be directed to the Azure cloud service main page as shown below.
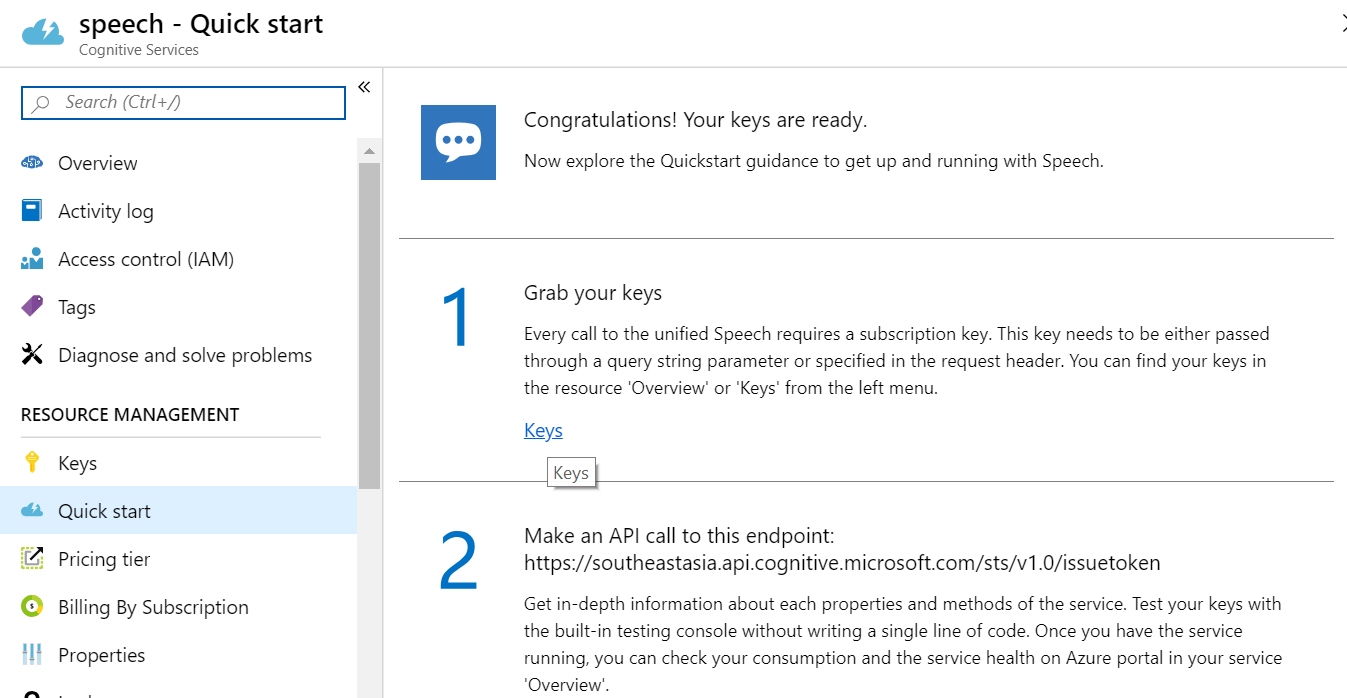
Click on the Keys link and copy any of the keys below. Use the API key and instance region to login to Azure Cloud Services from e-Learning Lab.
Step 2: Add Azure voices to e-Learning Lab
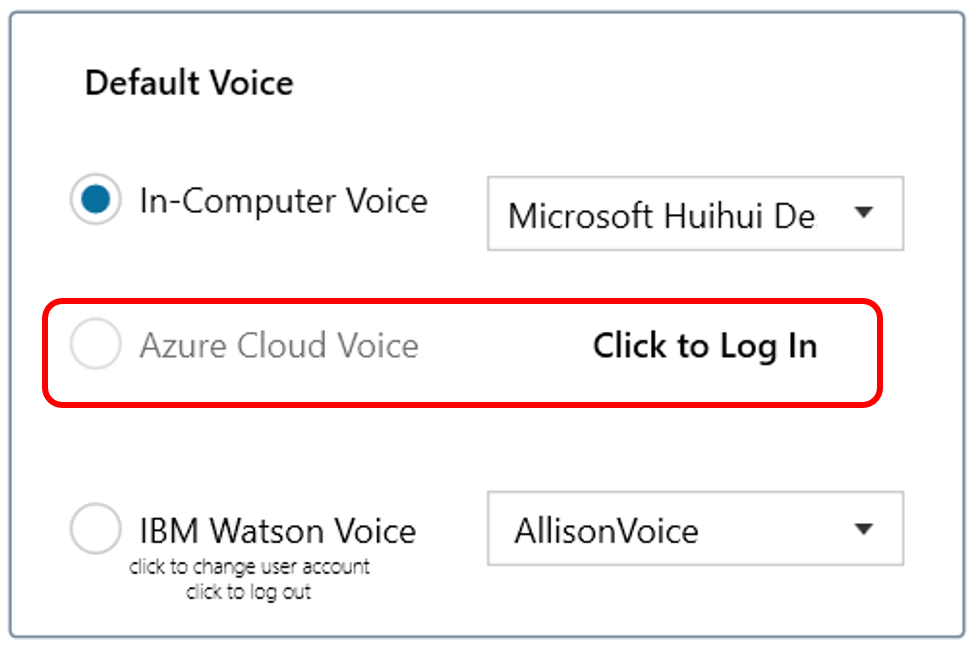
Open Settings page from eLL dropdown menu on PowerPointLabs ribbon and click on the Click to Log In button as shown below.
You will be directed to a login page as shown below.
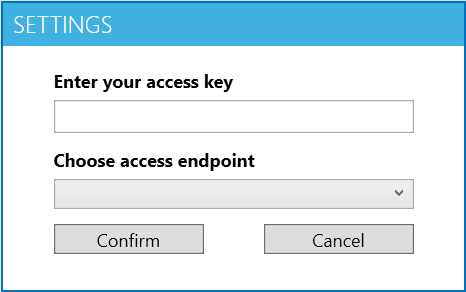
Enter your API key copied from step 1 and select the correct endpoint. Click Confirm to login.
Adding IBM Watson Speech Services
Step 1. Create a Watson Speech Service Instance
We will guide you towards creating a Watson text-to-speech instance under free plan.
The following procedures are adapted from Watson cloud documentation.
Option 1: Create Instance under Free Plan
To start off, go to the link here
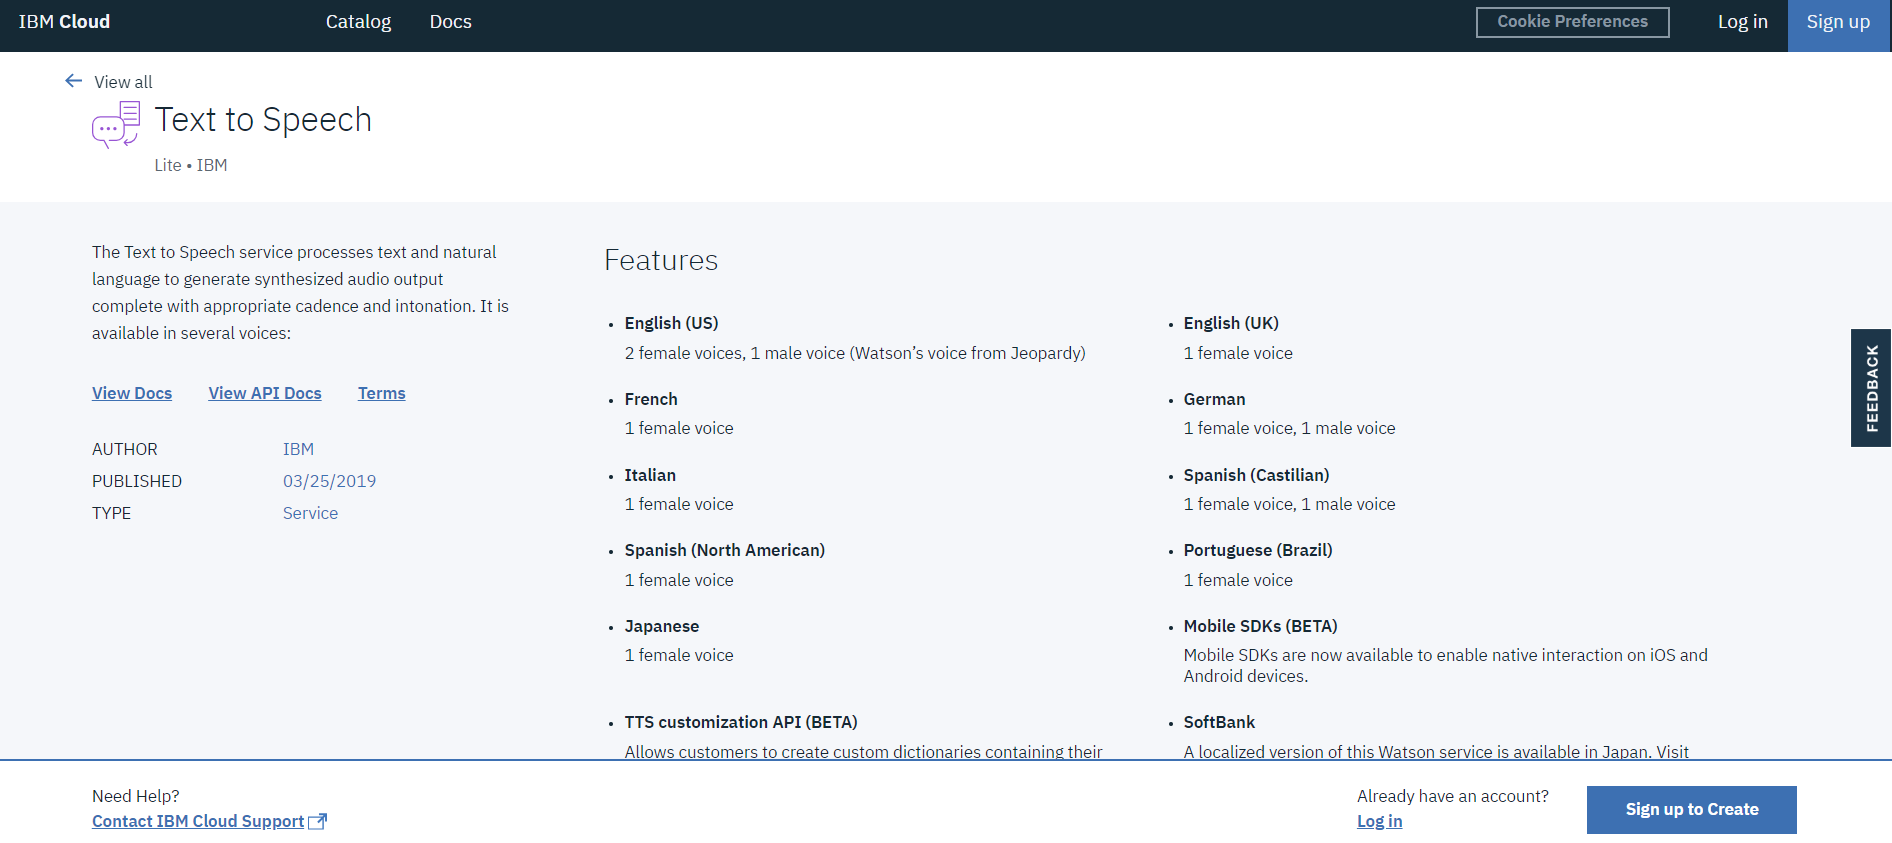
Click on Log in if you already have a Watson account. Otherwise, click on Sign up to Create.
Follow the steps as suggested by Watson website to complete the account creation process. You will be prompted with the following message upon successfully confirmed your email address.
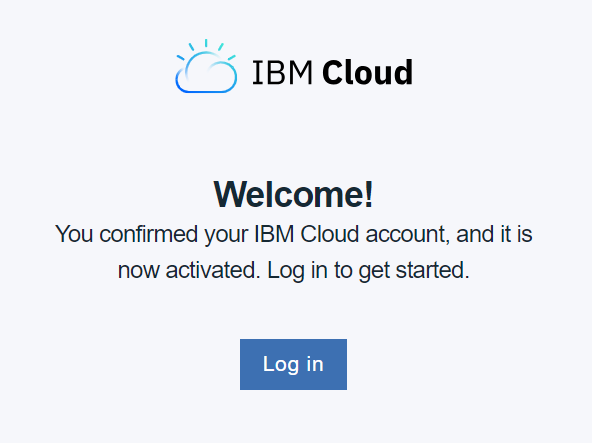
Click Log in button to log in to IBM cloud. Note that you should select IBMid under ID.
Key in your email and password that you used to register for IBM Watson account.
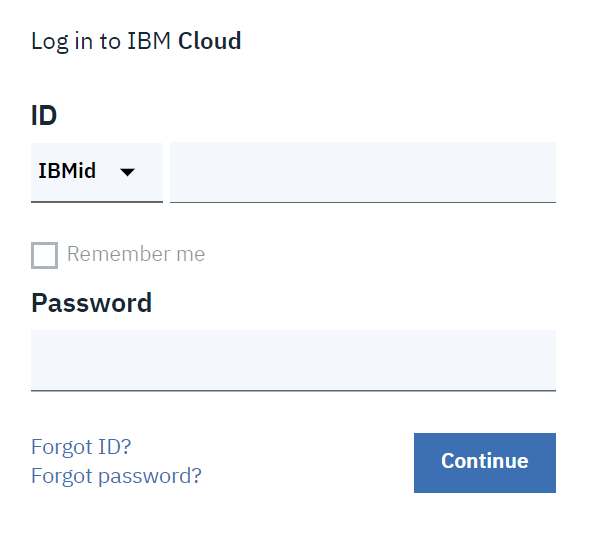
After clicking Continue, you will be directed to the IBM dashboard page. If not directed automatically or some error message showed up despite that you have keyed in your account credentials correctly, you can go to dashboard manually by clicking on this link https://console.bluemix.net/dashboard/apps . You will be presented with a similar page as shown below.
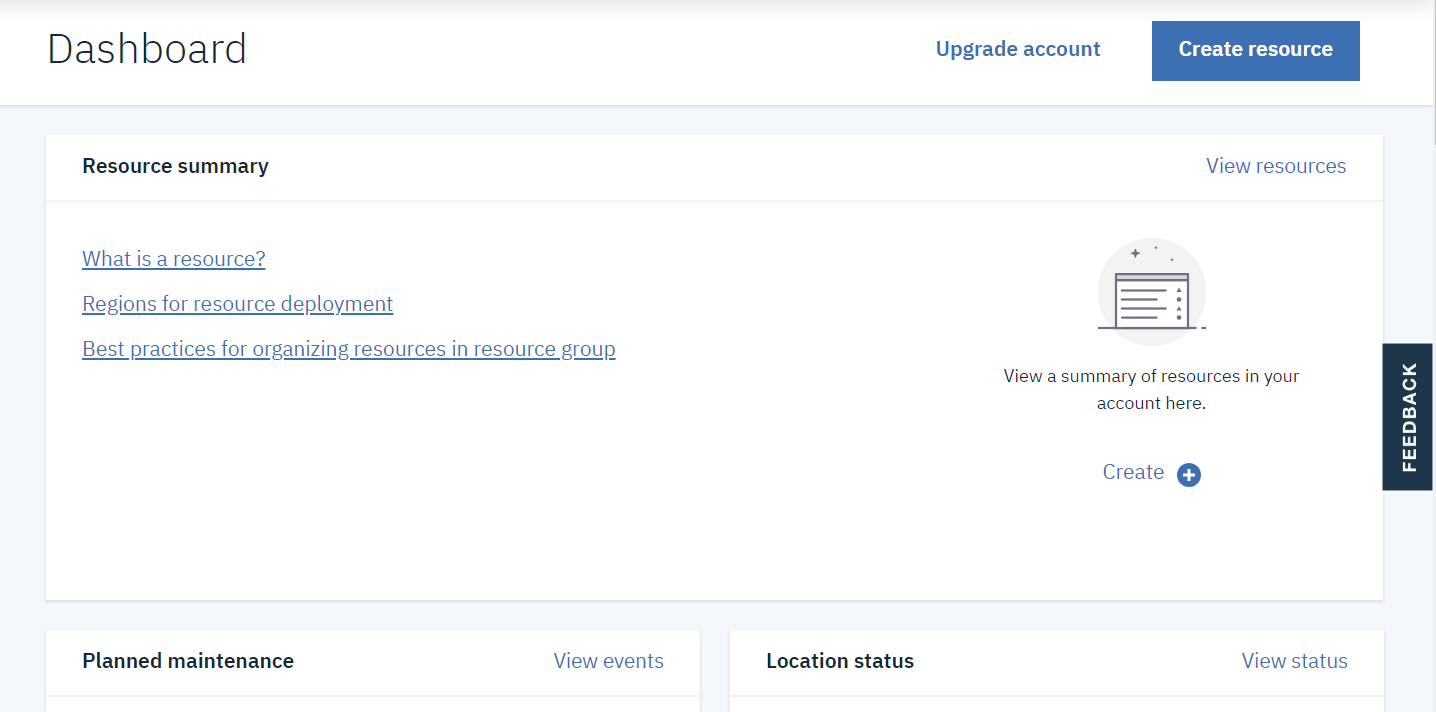
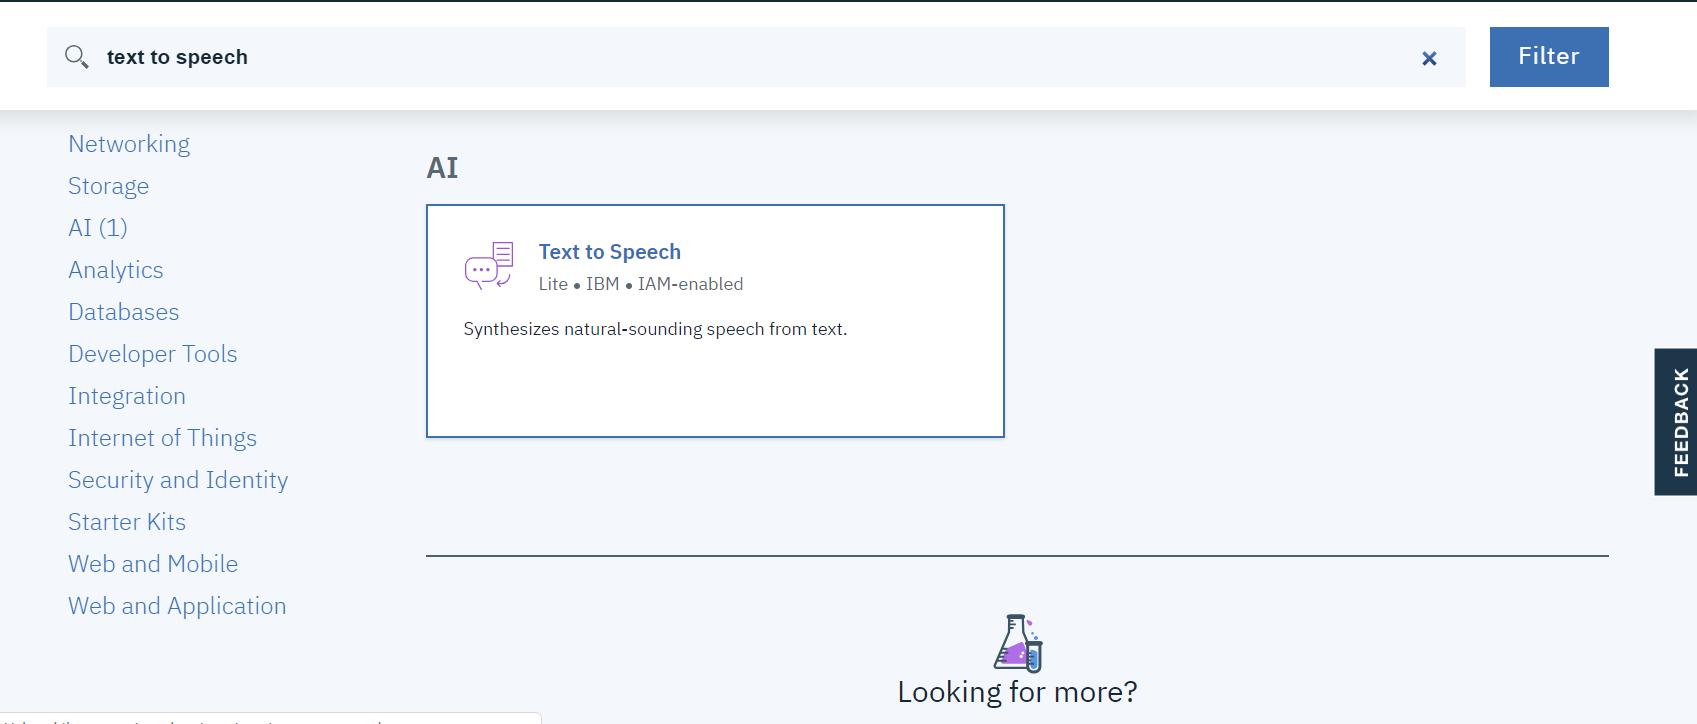
Click on the Create resource button on the top right of the page. You will be directed to a new page. Type "Text to Speech" in the search bar and select Text to Speech card under AI section.
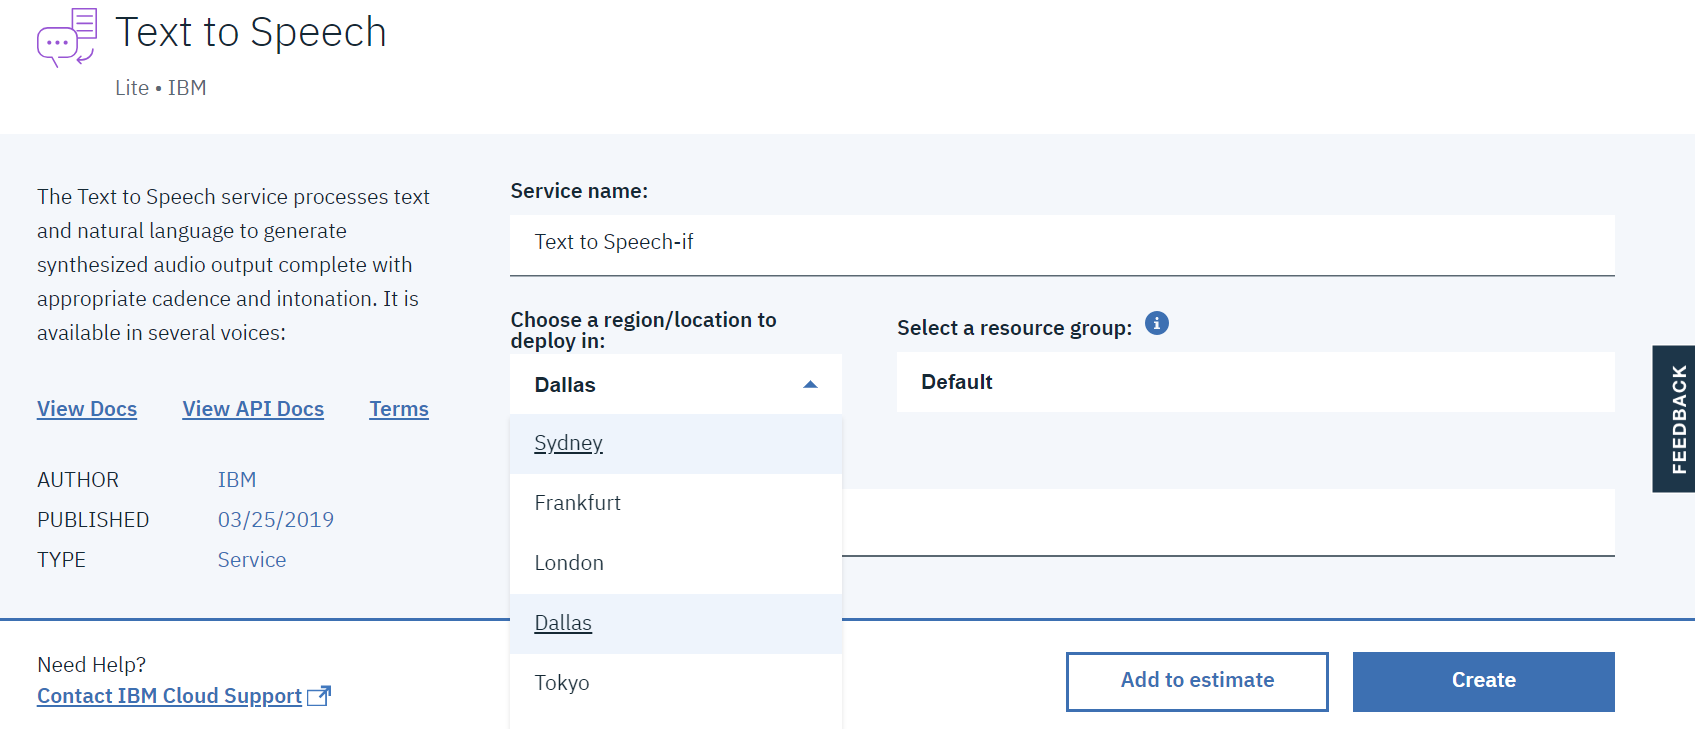
Select a deploy location that is nearest to your location, and click Create button.
You will be auto-directed to the newly created text-to-speech instance. Click on Service credentials on the left menu bar. Then click on your instance under Service credentials.
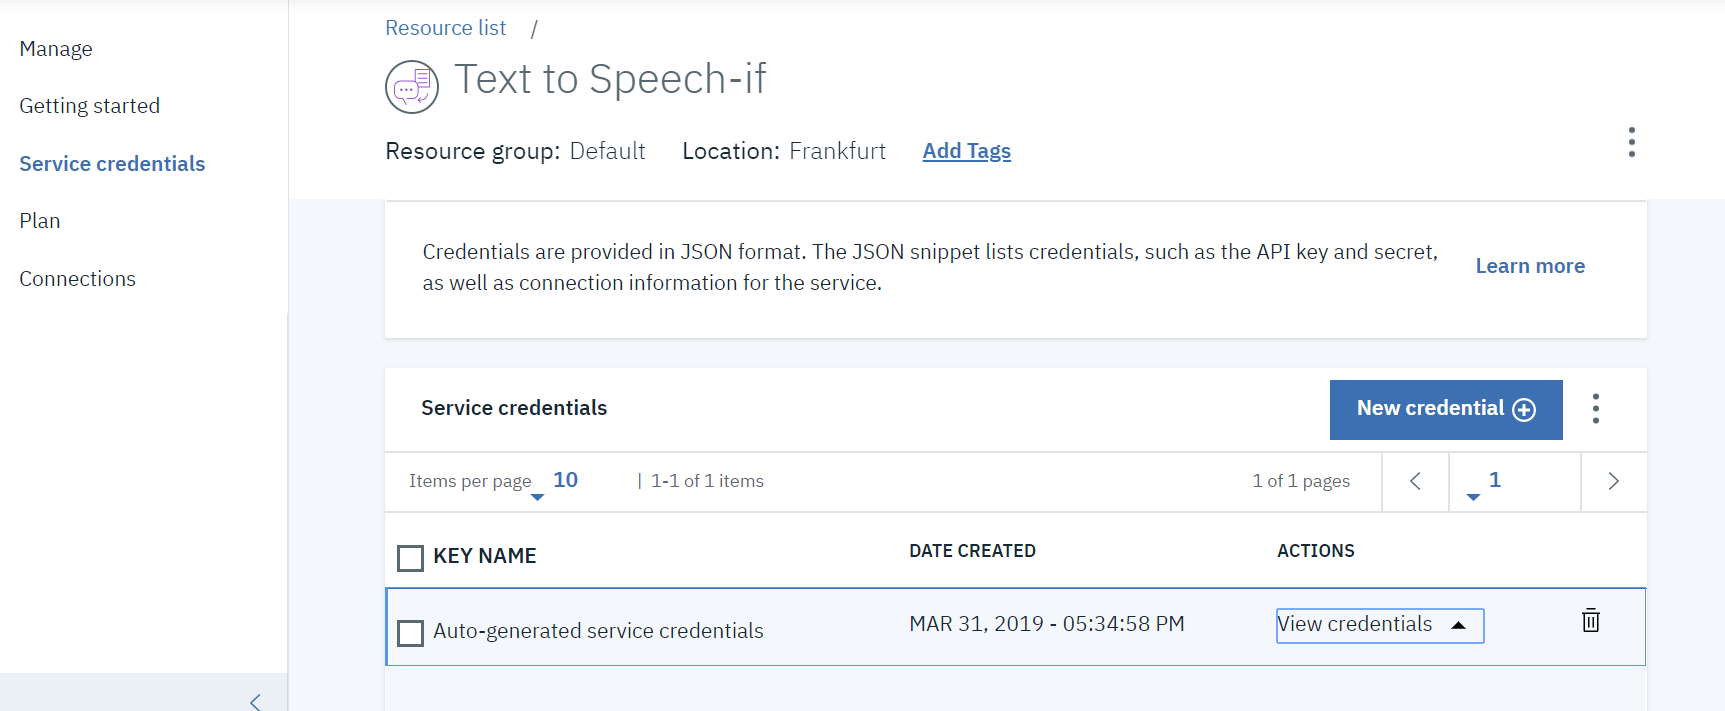
Click on the View credentials button to reveal your instance credentials. Your credentials should look similar to the one below.
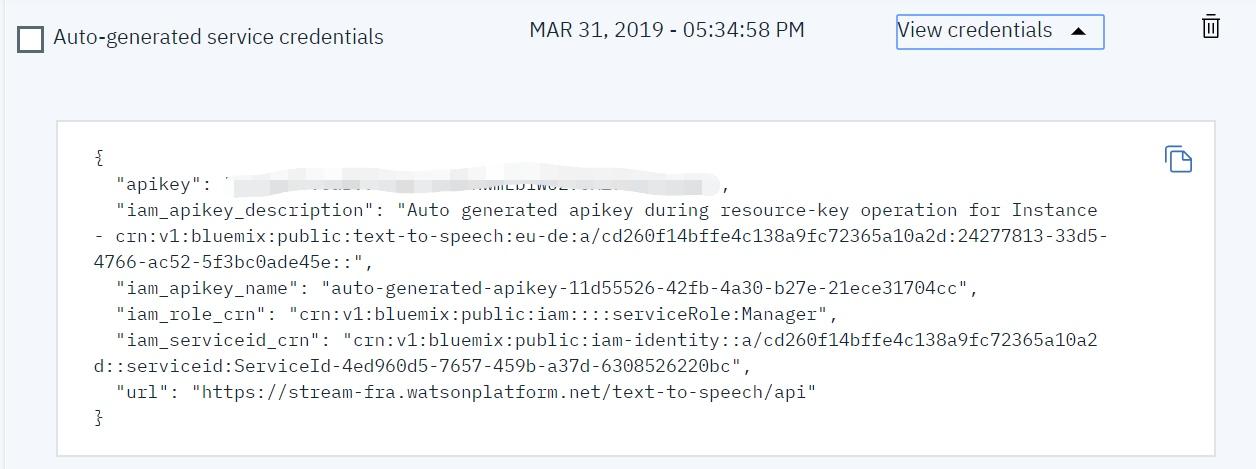
Copy the apiKey value. Key in this value when you login to Watson voice. The region refers to the location where you choose your instance to be deployed in.
Note: Only 10,000 characters are allowed under
freeplan, to upgrade to standard plan with unlimited characters, we suggest you to continue reading option 2.
Option 2: Create Instance under Standard Plan
If you create your TTS instance under free tier, then you are only allowed to generate 10,000 characters per month. The instance will be automatically deleted after 30 days of inactivity. To upgrade to standard tier, go to your dashboard and click on your instances. Choose Plan from the menu bar and select Standard tier. Click Save to save your changes.
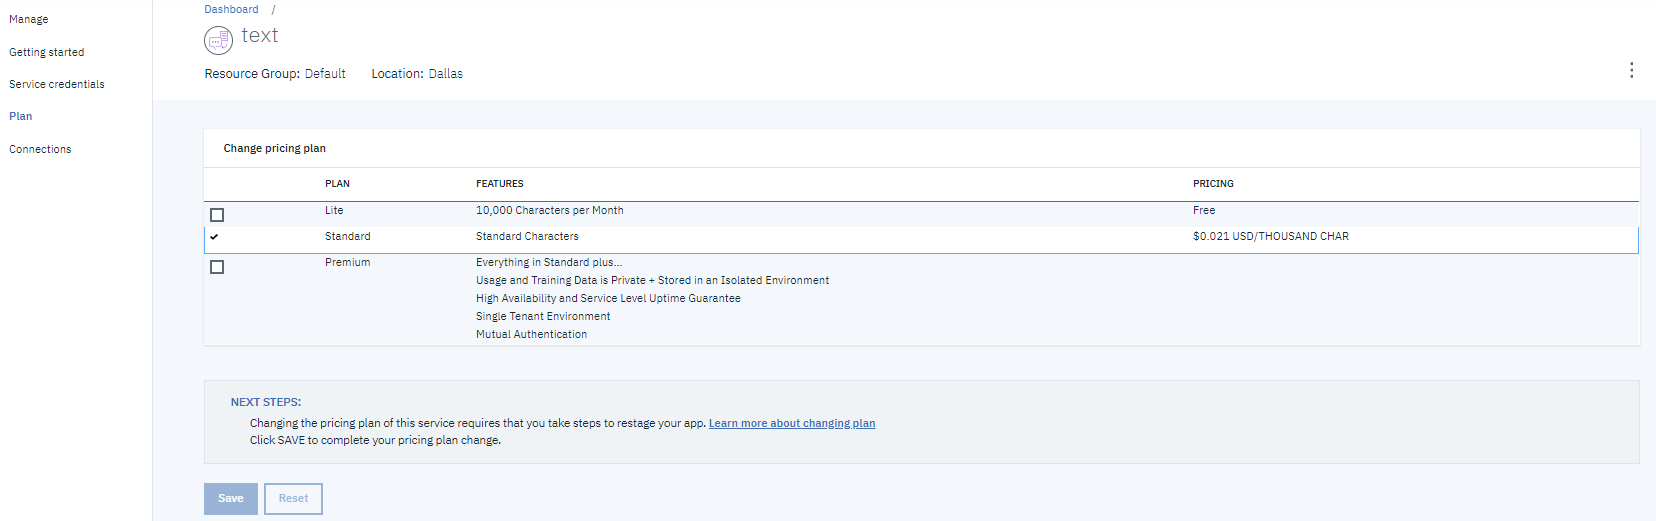
You may need to re-stage or re-start your instance after that. For details, please refer to here .
Step 2: Add Watson voices to e-Learning Lab
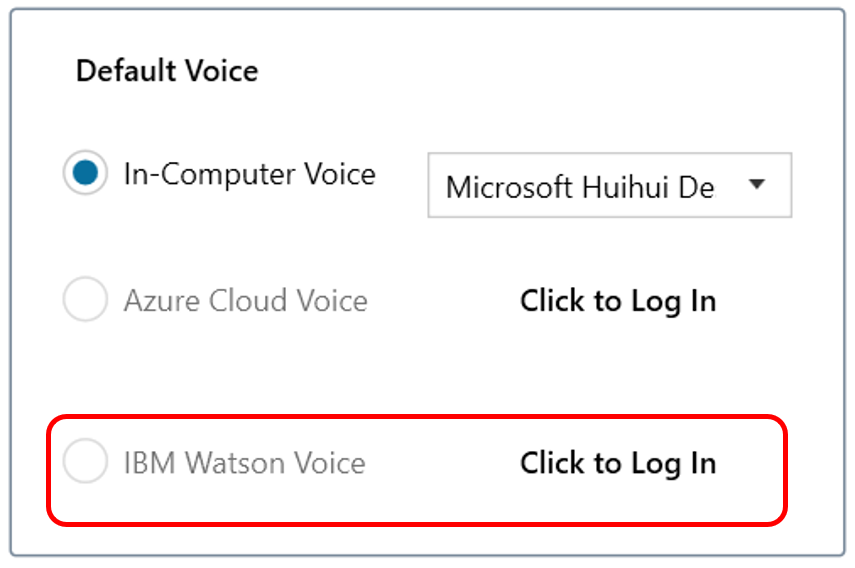
Open Settings page from eLL dropdown menu on PowerPointLabs ribbon and click on the Click to Log In button as shown below.
You will be directed to a login page as shown below.
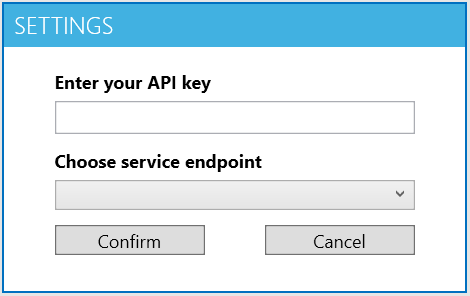
Enter your API key copied from step 1 and select the correct endpoint. Click Confirm to login.